This dataset includes bank account openings. The data couldn’t be saved on the page as a PDF.
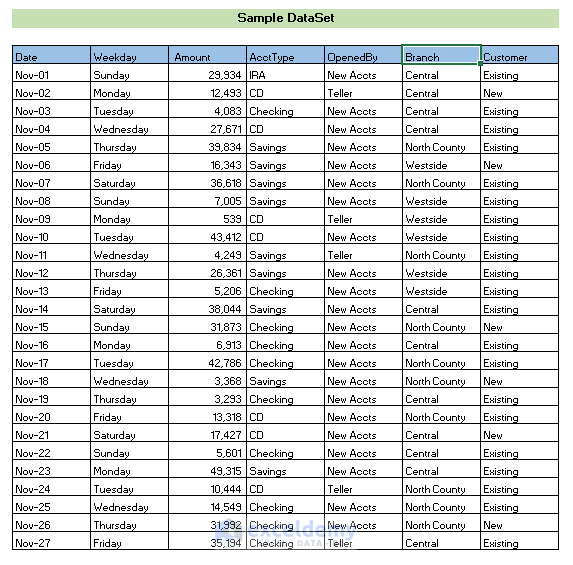
Method 1 – Using the ‘Fit To’ Option
STEPS:
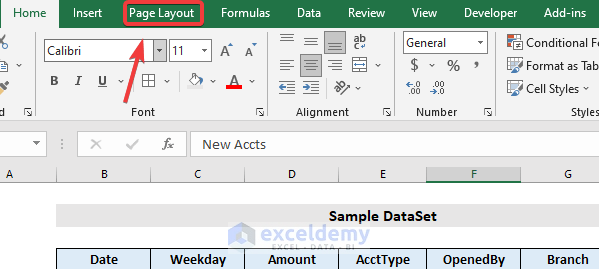
- Click on Page Layout.
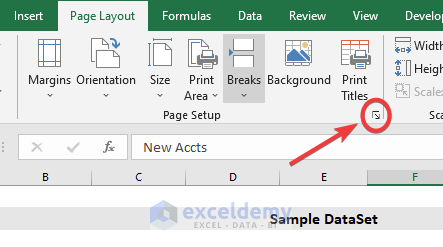
- Click on the little Dialog Box Launcher in the right bottom corner.
A Page Setup window will appear.
- Don’t exit from the Page tab.
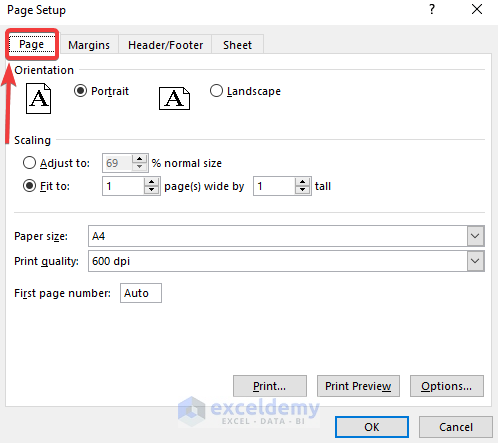
- Select the Fit to button under the Scaling section. Choose 1 page(s) wide by 1 tall in the Fit to boxes. Select a suitable Paper size you need to print it.
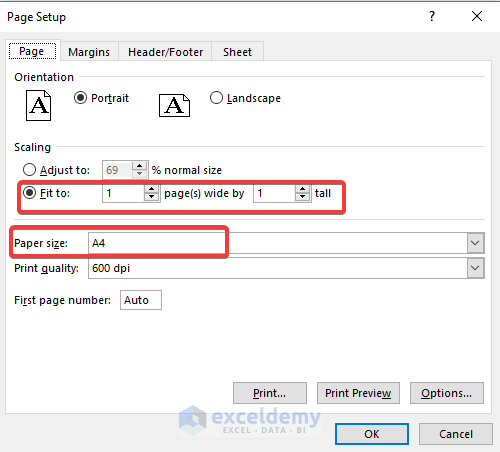
- Press OK to close the Page Setup dialog box
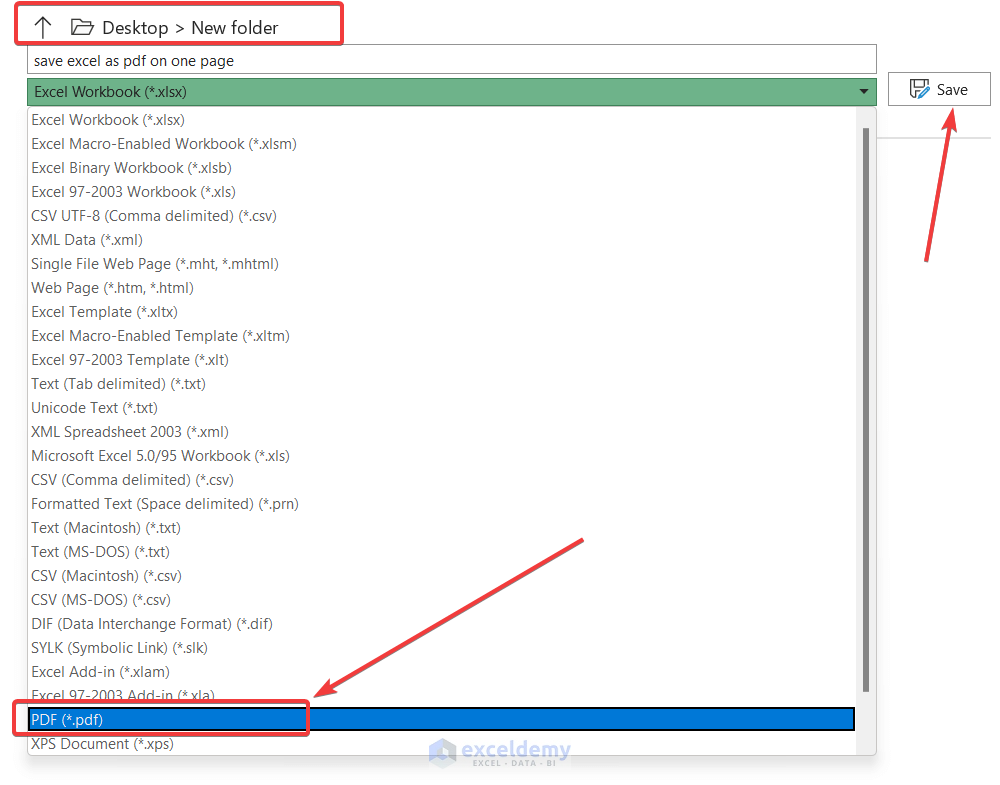
- To save the file as PDF directly, Press File > Save As, select Location, and select PDF in the Save As Type drop-down menu.
- Press the Save button.
Read More: How to Convert Excel to PDF without Converter
Method 2 – Using the ‘Fit Sheet on One Page’ Option
STEPS:
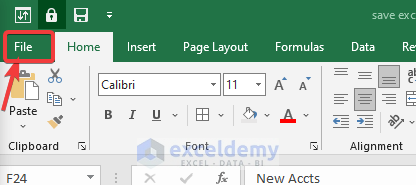
- Click on the File tab in the top-left corner of the window.
- Click the Print option on the left side of the window.

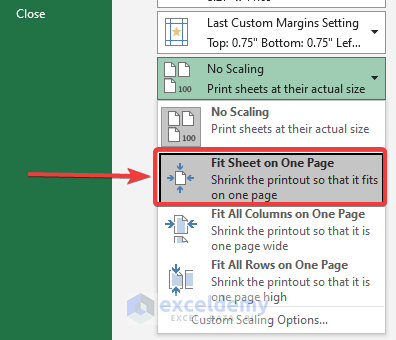
- Press the No Scaling drop-down under the Settings section. And other options will appear.
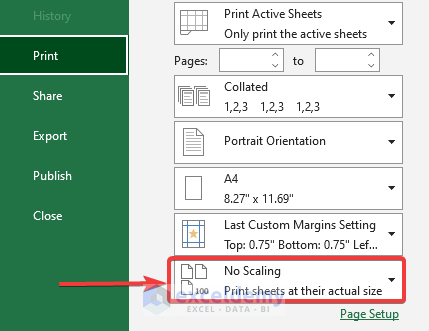
- Select the Fit Sheet on the One Page option.
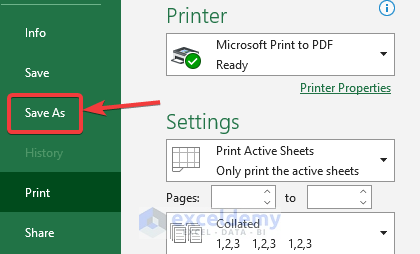
- Click the Save As button in the left column.
- Click on the Save As Type menu; other options will appear. Select the PDF option to save as PDF.

Note: This setting allows us to print large spreadsheets in very small sizes. For better results, you might also try the Fit All Columns on One Sheet or the Fit All Rows on One Sheet option.
Read More: How to Convert Excel to PDF with All Columns
Method 3 – Setting up Page Layout
STEPS:
The page layouts and margins won’t be visible in Excel. You have to set up the page layout.
- Click on the Page Layout option on the ribbon bar.
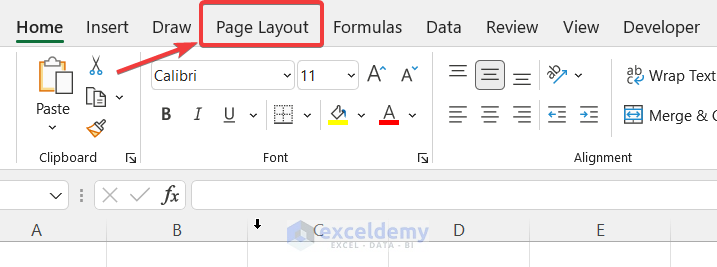
- Find Margins, Orientation, Size, and Print Area. All four elements are to be set up before saving them as PDFs.
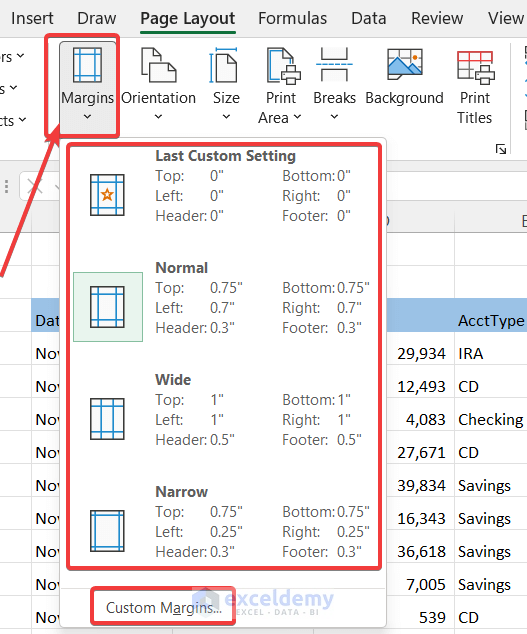
- Press the Margins button.
- Select one from the drop-down menu. If you want to set up a margin yourself, select Custom Margins.
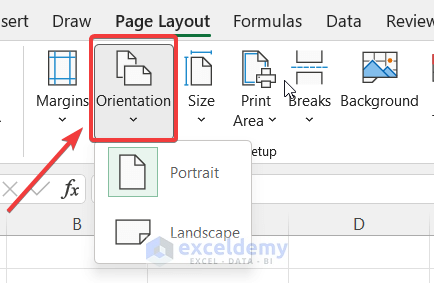
- The Excel page is in Portrait Orientation. You can change the landscape orientation for a large number of columns.
- Press on the Orientation drop-down and select the Landscape option
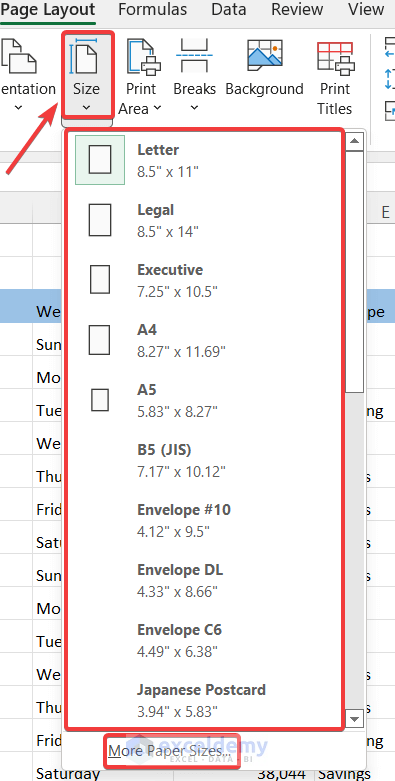
- Page size is the most important factor for fitting data into a single page. Some columns can be out of margin without proper page size for printing.
- Press the Size drop-down and select anyone as per your requirement from the drop-down menu. We usually use A4.
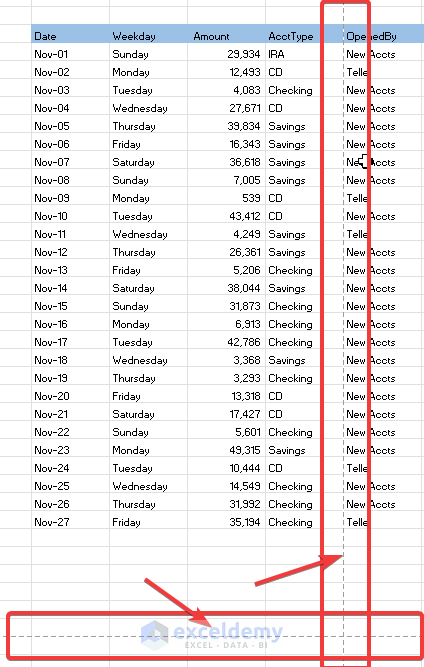
- After setting up the page size, some Dashed lines will be visible. You can change the column and row size manually to fit the sheet on one page.
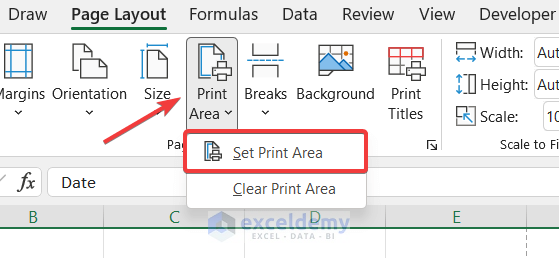
- Select all the cells that you want to print. Then Click on Print Area > Set Print Area.
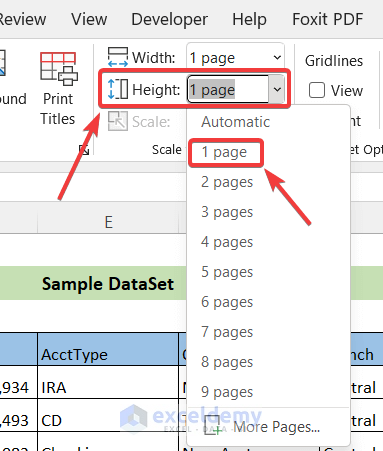
- Set the Width and Height to 1 Page in the Scale to Fit Section to save selected Cells on 1 page.
- Press FIle > Save As and select PDF in the Save As Type drop-down menu. Then Press Save.
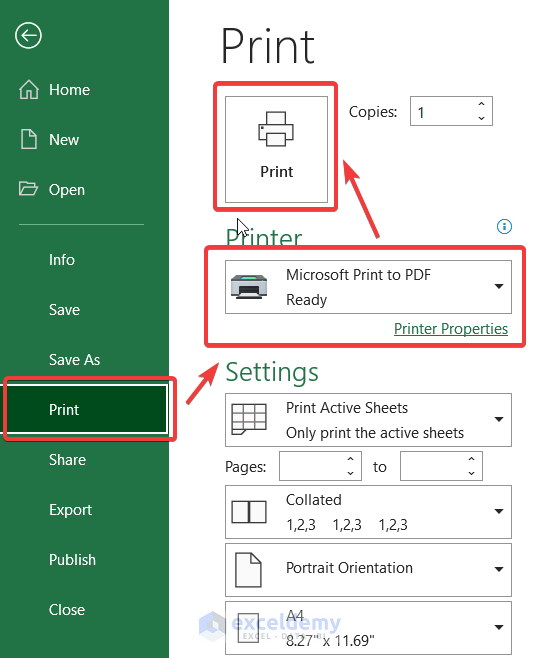
You can also save pdf from print options.
- Click File > Print or press CTRL P to go to the print option, Press Microsoft Print to PDF from Printer List, and Press Print.
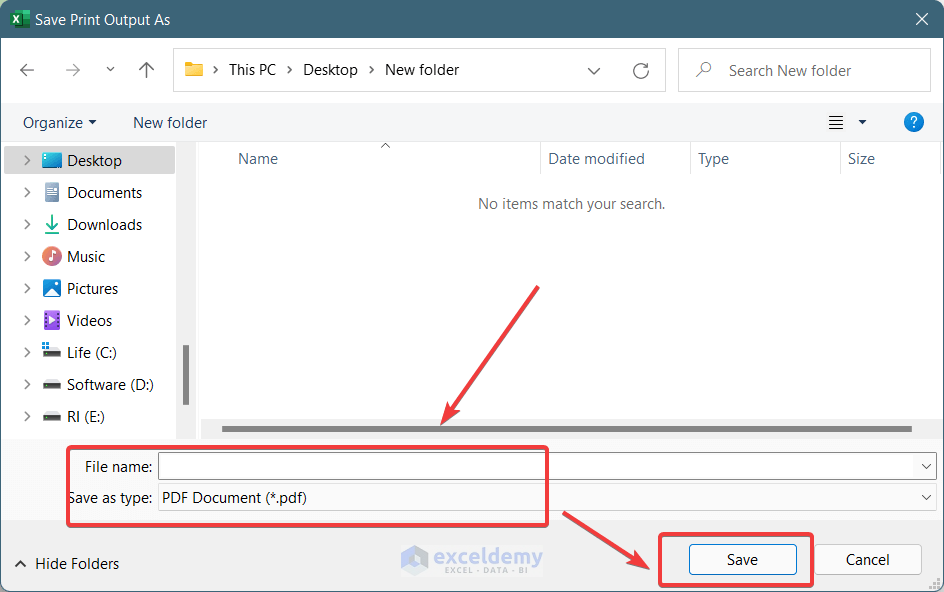
- Save Print Output As window will appear. Select the location to save your file, enter a suitable file name, and press Save to save your file as PDF on one page.
Read More: How to Save Excel as PDF without Cutting Off
Download the Practice Workbook
Download the following practice workbook for free.
Related Articles
- How to Convert Excel to PDF without Losing Formatting
- Export Excel to PDF with Hyperlinks
- How to Save Multiple Excel Sheets as One PDF
- How to Create a Fillable PDF from Excel
- How to Deal with Margin Problem While Converting Excel to PDF
- [Fixed!] Excel to PDF Size Problem While Printing
- [Fixed!] Excel to PDF Hyperlinks Not Working
<< Go Back to Export Excel to PDF | Export Data from Excel | Learn Excel
Get FREE Advanced Excel Exercises with Solutions!
