Step 1 – Create an Excel Table
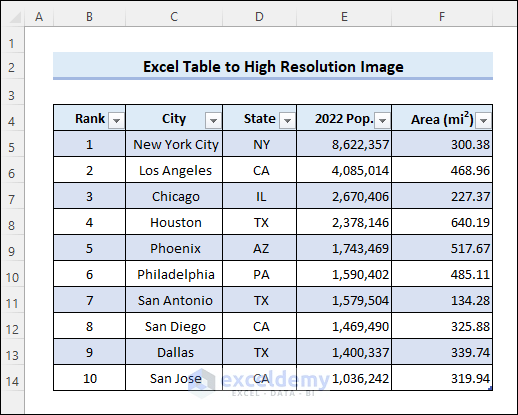
Create a table in excel using the CTRL+T shortcut.
Step 2 – Copy the Table as Picture
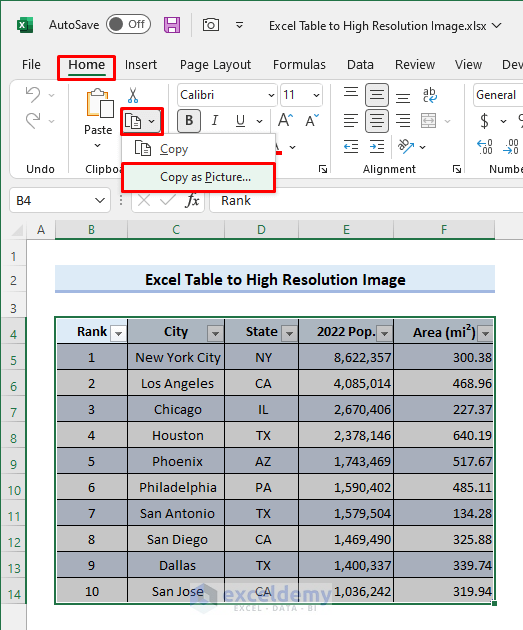
- Select the table area and copy it as a picture from the Clipboard group in the Home tab.
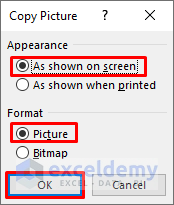
- The Copy Picture dialog box will open. Keep the Appearance As Shown on Screen and the Format as Picture. Click OK.
Step 3 – Paste & Enlarge the Picture
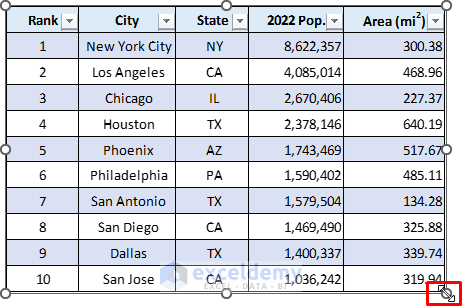
- Paste the copied image anywhere in the worksheet. You can use the CTRL+V shortcut to do that.
- You could’ve copied the table using the CTRL+C shortcut and pasted it as a picture using Paste Special to get the same result.
- Select the image and put the cursor on a circle in any corner of the image. You will see a double-sided arrow. Drag the corner to zoom the image considerably. The image will stay sharp no matter how much you zoom it.
Step 4 – Save Table as Picture
- Right-click on the image and select Save as Picture.
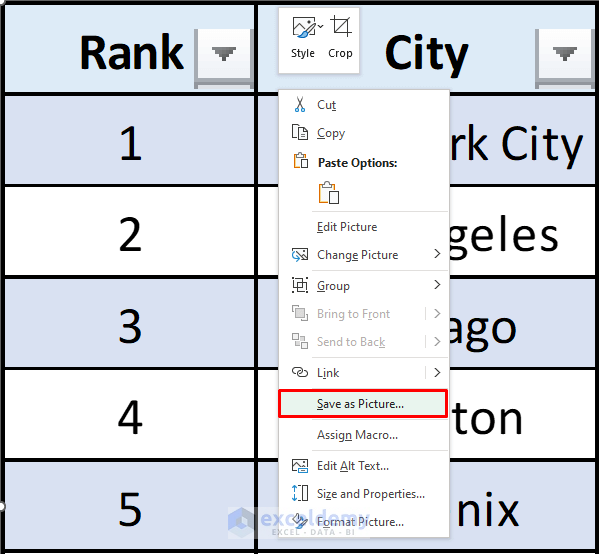
- Enter a file name and choose a file format in the Save as Picture Click on the Save button.

Read More: How to Save Image from Excel as JPG
Step 5 – Check Image Quality
- Open the image file and zoom in. You will see the following result at 200% zoom.

Step 6 – Increase Image Resolution
- You can right-click on the image file and select Properties to see the image resolution from the Details You may see that the image resolution is 96 dpi only. You can export the image with a higher resolution if needed using any photo editing software.
Read More: How to Save Excel Chart as High Resolution Image
Things to Remember
- Enlarge the pasted image as much as possible before saving it as a picture. This will allow you to enlarge the image without making it pixelated.
- Increasing the image resolution using the photo editing software may not increase the image quality. It is just to meet the requirement for image resolution.
Related Article
<< Go Back to Save Excel as Image | Export Data from Excel | Learn Excel
Get FREE Advanced Excel Exercises with Solutions!

