Method 1 – Applying Version History Feature to See Who Made Changes in Excel
All newer versions of Excel come with a Version History feature that lists how the file has changed between different users.
Steps:
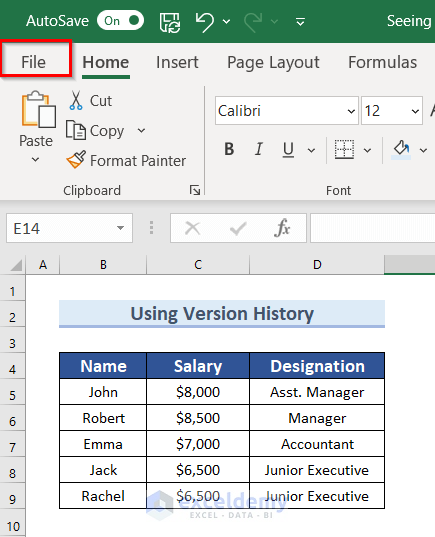
- Go to the File bar from the top ribbon.
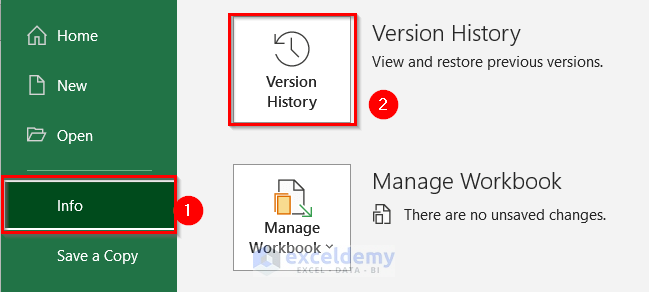
- Select Info and choose Version History.
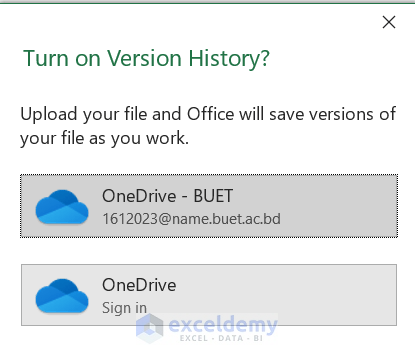
- You will need to upload your file in OneDrive to turn on Version History.
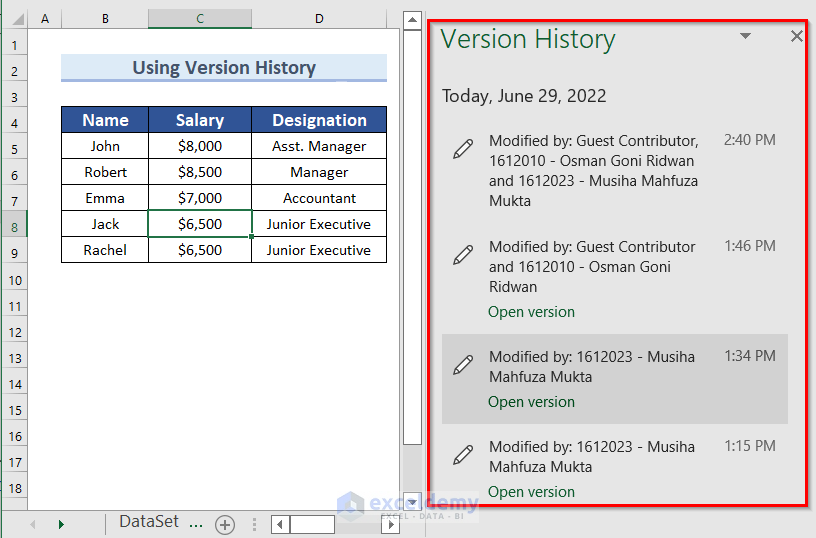
- After you upload the file, you’ll be able to see its Version History. From this, you will be able to know who made changes to your workbook.
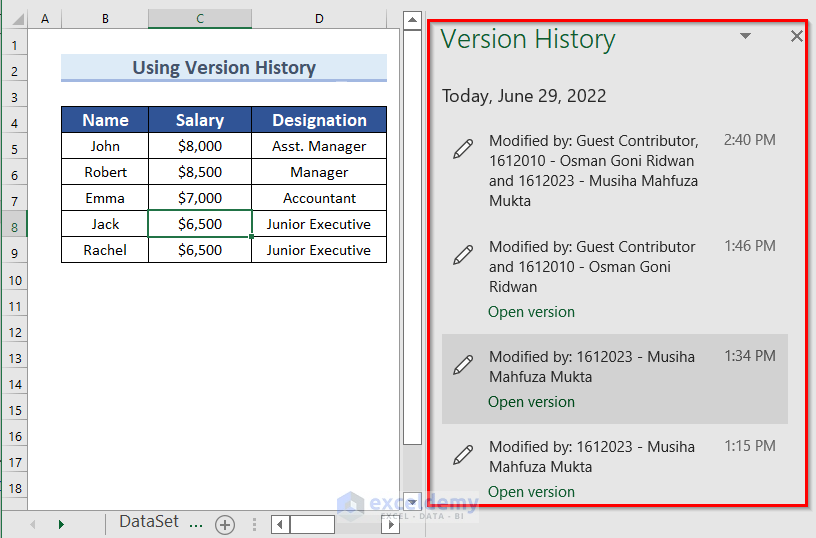
Since the file you download from the exercise is a duplicate of the content, it will have a blank version history.
Method 2 – Turning on Version History from Drop-Down Arrow in Excel
Steps:
- Click on the drop-down arrow beside the Saved text.
- Select Version History.
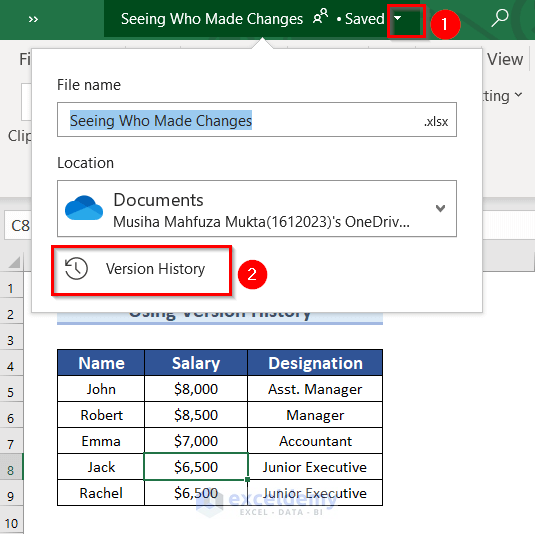 As a result, you can see the Version History. You might need to turn on the feature by uploading and saving the file first.
Read More: How to Check Edit History in Excel Online
Method 3 – Using Track Changes Feature in Offline Version of Excel
If you’re working offline, you can use the Track Changes feature to see who made changes in Excel.
Steps:
- Go to the Review tab from the top ribbon.
- Select Track Changes.
- Choose Highlight Changes.
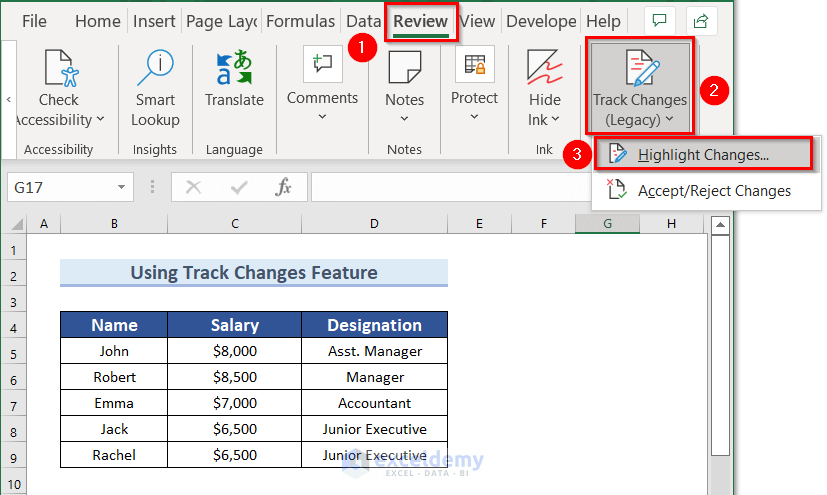
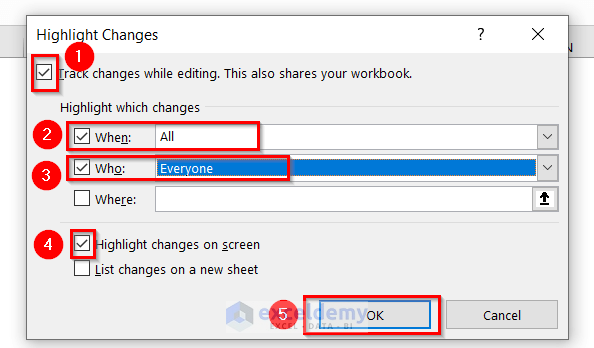
You should see the following box.
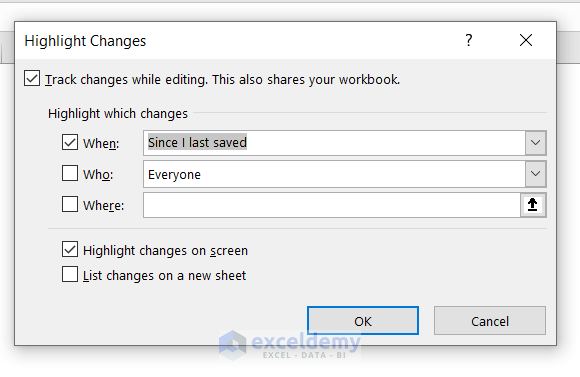
- Now, select Track changes while editing.
- In Highlight which changes, tick When and choose All, then tick Who and select Everyone.
- Select Highlight changes on the screen.
- Press OK to confirm.
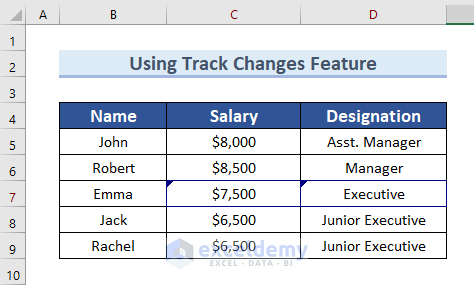
Now, if you make any changes to the worksheet then there will be a blue sign on the corner of the cells.
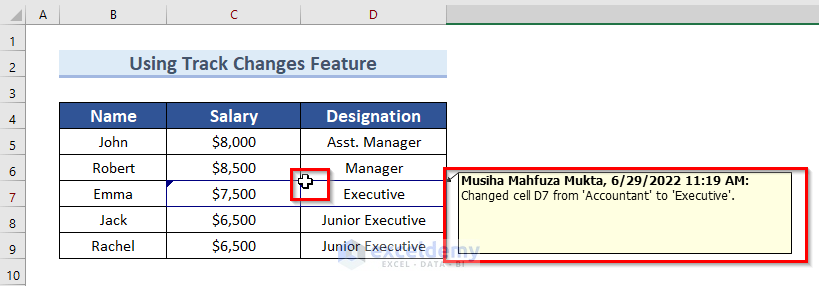
Subsequently, clicking on the blue sign shows more details on who made changes and what they changed.
In case you have no Track Changes (Legacy) ribbon on your Excel, you will need to add it.
Steps:
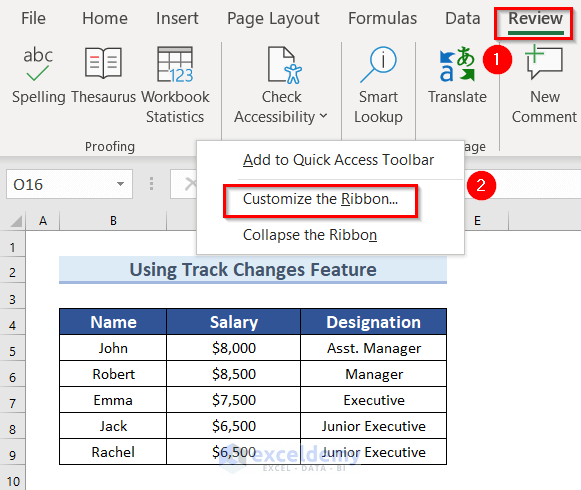
- Go to Review.
- Right-click on any free space on the top menu.
- Select Customize the Ribbon…
The Customize the Ribbon window should pop up.
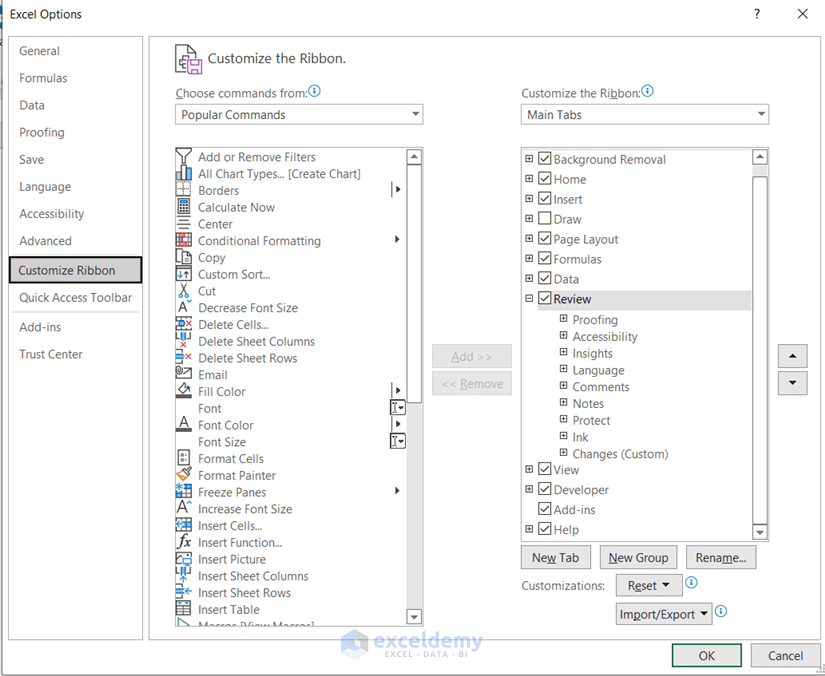
- Select New Group.
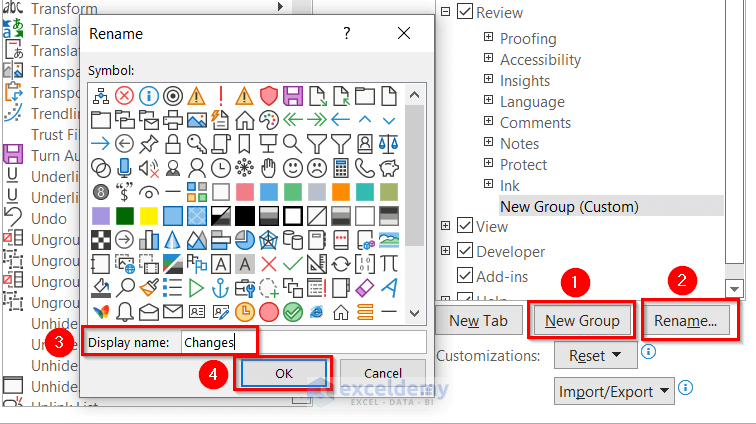
- Go to Rename and fill in the Display name with anything you want (this example used Changes).
- Press OK.
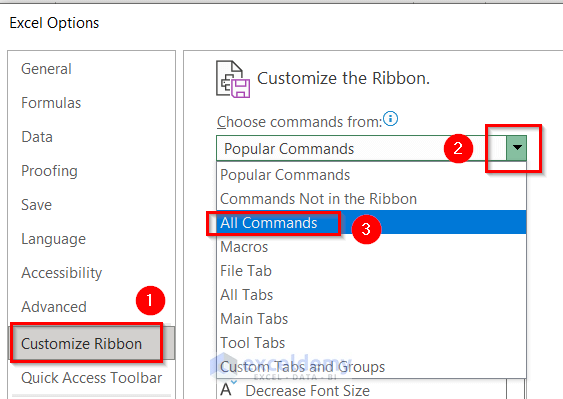
- Under the Choose commands from drop-down arrow, choose All Commands.
- Find Track Changes (Legacy), select it, and click on Add.
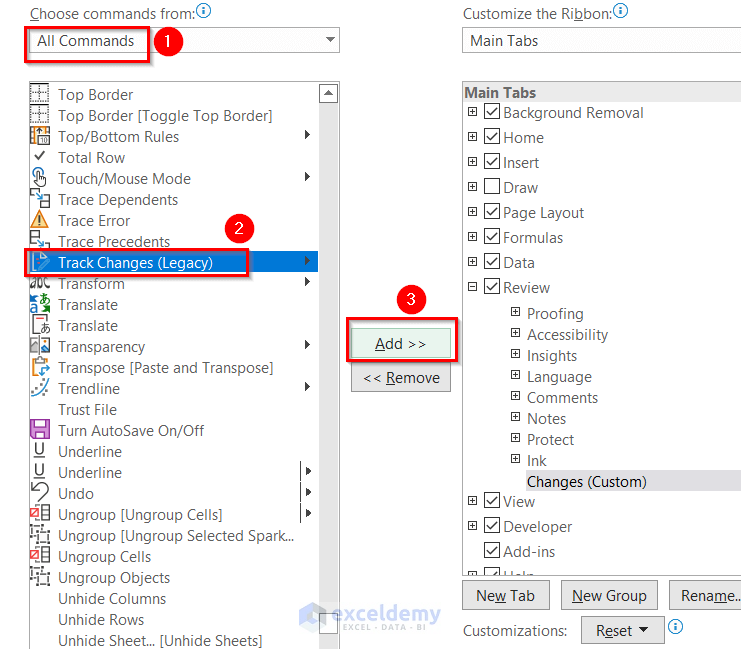
Press OK to make the new ribbon section.
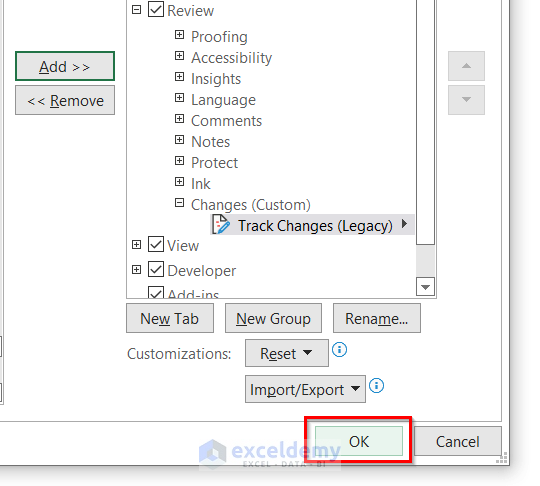
Finally, you will see the Track Changes (Legacy) ribbon in your Excel.

Method 4 – Utilizing the Context Menu Bar While Using Online Version of Excel
In the online version of Microsoft Excel, these features are in the context menu.
Steps:
- Create an online Excel sheet.
- Select the cell for which you want to see the changes. Here’s an example with the D6 cell.
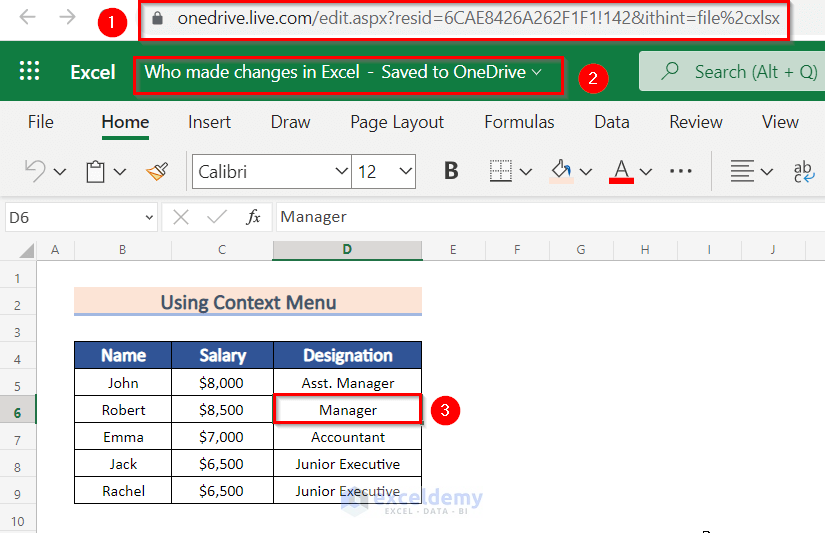
- Right-click on cell D6.
- From the Context Menu that pops up, choose Show Changes.
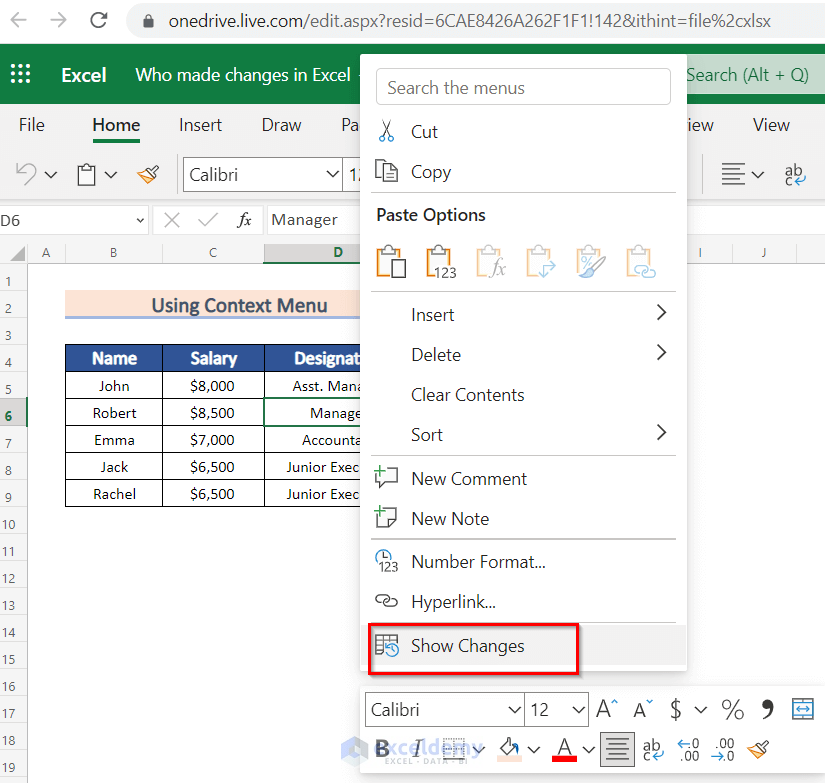
You can now see who made changes to that cell.
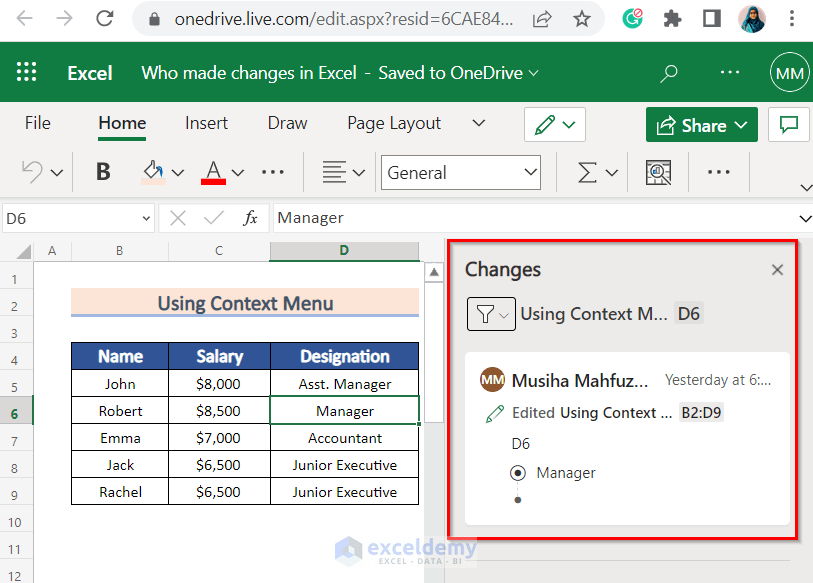
Method 5 – Using the Show Changes Feature in Online Version of Excel
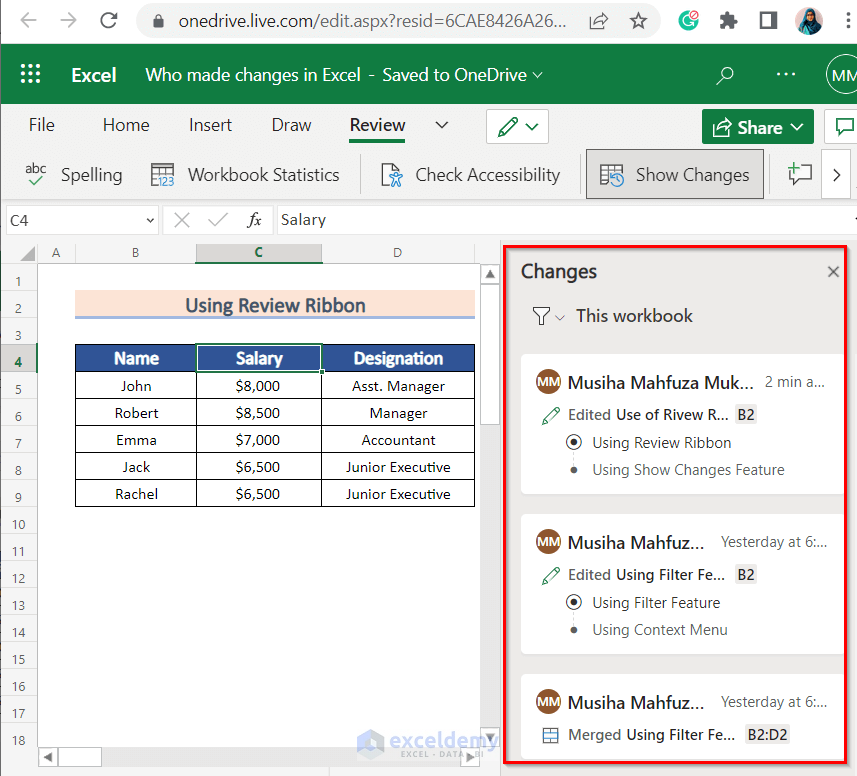
In the online version of Microsoft Excel, you will also get the Show Changes ribbon button on the top to simplify version tracking.
Steps:
- Create an online Excel sheet.
- Go to the Review ribbon.
- Press Show Changes.
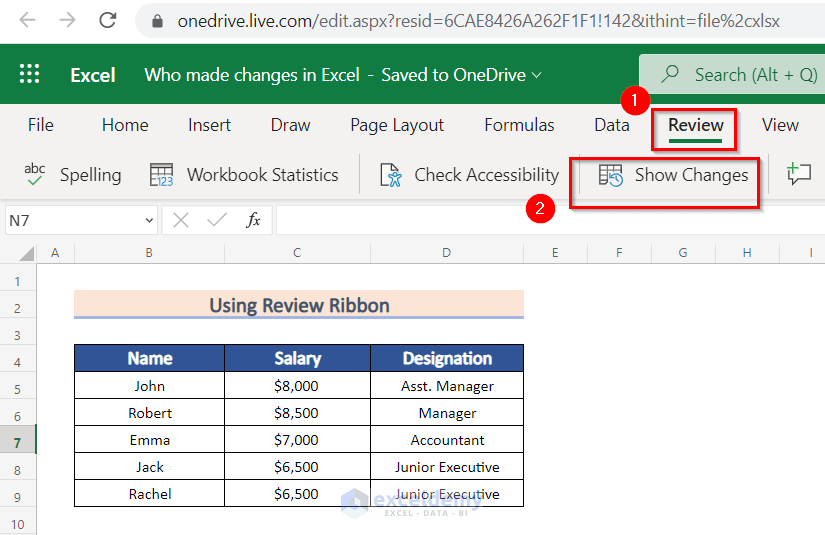
Finally, you can be able to see who made changes to your sheets.
Method 6 – Applying Filter Feature from Changes Panel While Using Online Version of Excel
You can use the filter feature for choosing different sheets or ranges to see who made changes.
Steps:
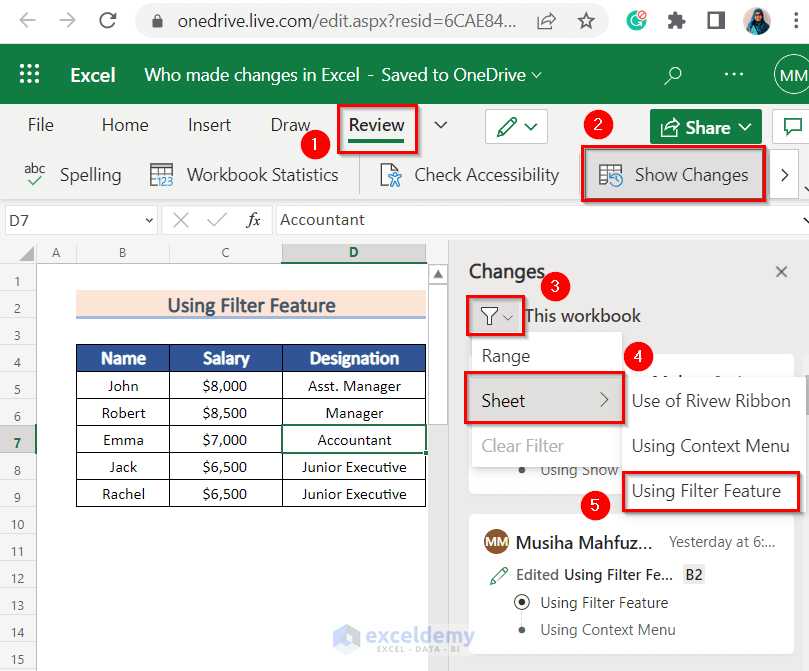
- Go to the Review ribbon and choose Show Changes.
- In the Changes panel, click on the filter icon.
- Select Sheet, then choose Using Filter Feature.
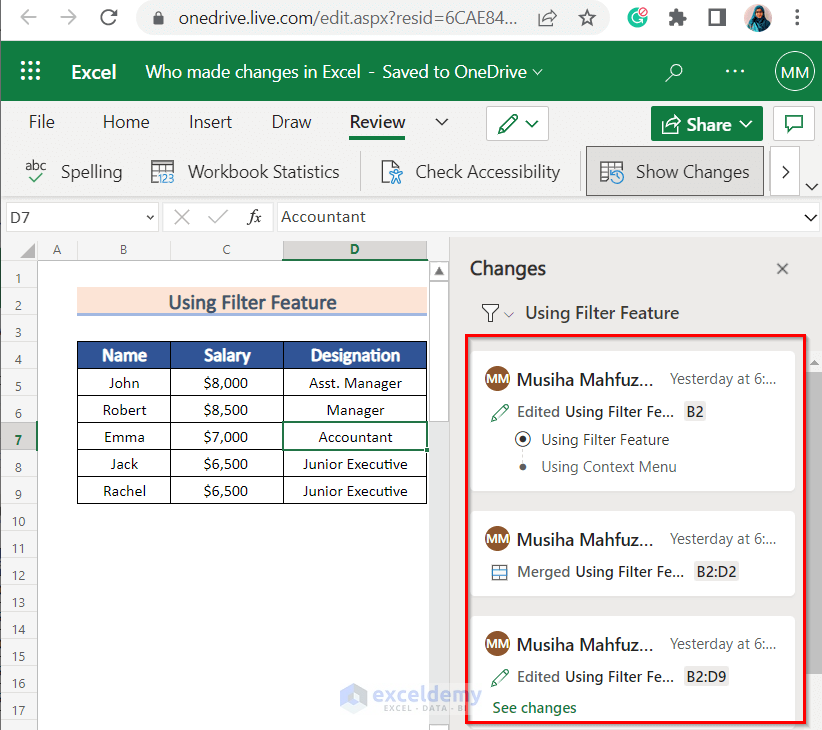
Finally, you can see who made changes to the corresponding Using Filter Feature sheet.
Things to Remember
- Without uploading the file to the drive, you won’t be able to turn on the Version History.
- If you don’t see the Track Changes (Legacy) command then you have to customize the ribbon to include it.
- For the 4th, 5th, and 6th methods, you have to use the online version of Excel.
Download Practice Workbook
You can download the practice workbook from here:
Related Articles
<< Go Back to Track Changes | Share Workbook | Workbook in Excel | Learn Excel
Get FREE Advanced Excel Exercises with Solutions!

