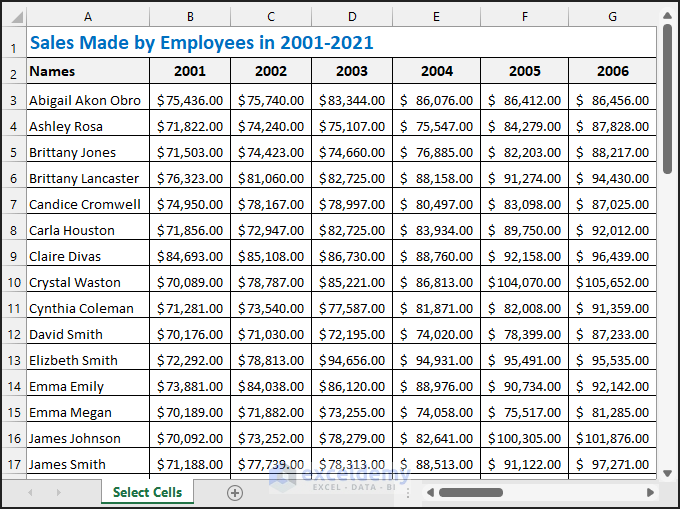
We will use the following dataset to illustrate selecting cells.
Method 1 – Click & Drag to Select a Range of Cells in Excel
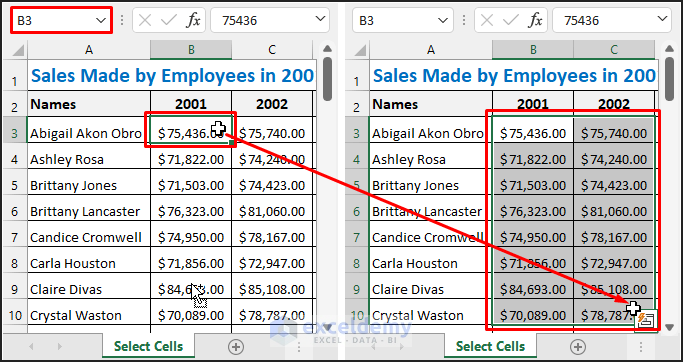
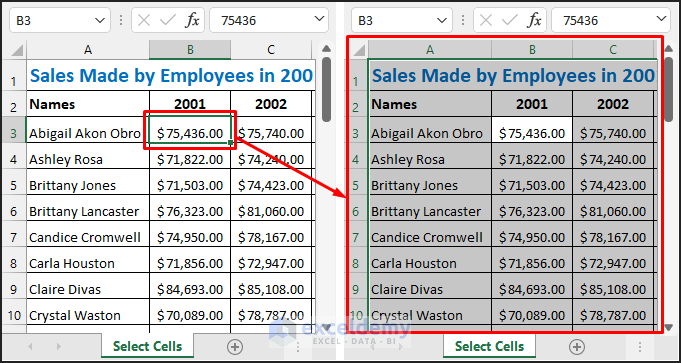
- For example, click on cell B3 and drag it to cell B10. You will see the entire range of cells B3 to B10 are selected as follows.
Method 2 – Select a Range of Cells Using Keyboard Shortcut
- Select cell B3.
- Press SHIFT+ ➔ (Right Arrow) + ⬇ (Down Arrow). After that, you will see range B3:C4 is selected as shown below.
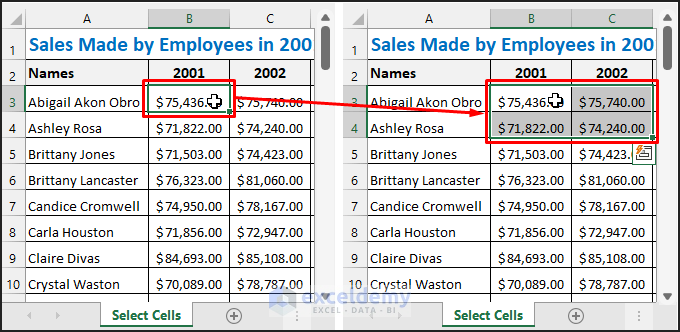
- You can press the arrows more times to extend the selection.
- Use ⬆ or ⬅ to select cells above or left to the first cells respectively.
Alternatively:
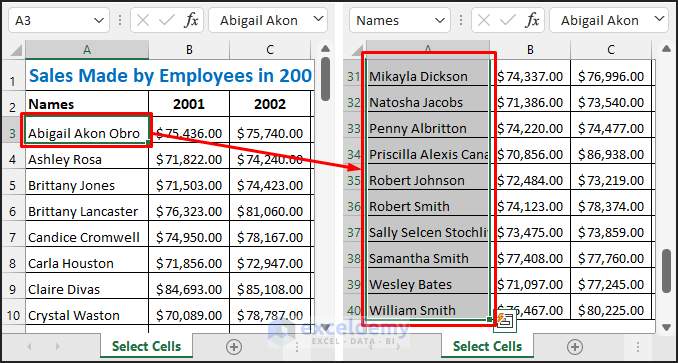
- Select cell A3. Then press Ctrl + Shift + ⬇. This will select all the cells below A3 until a blank cell is found. You can use the other arrows accordingly.
- Press Ctrl + A to select the entire range of cells.
Method 3 – Use the Name Box to Select a Range of Cells in Excel
- Enter B5:C10 in the Name Box above the upper left corner of the dataset. You will see the range selected as shown in the following picture.
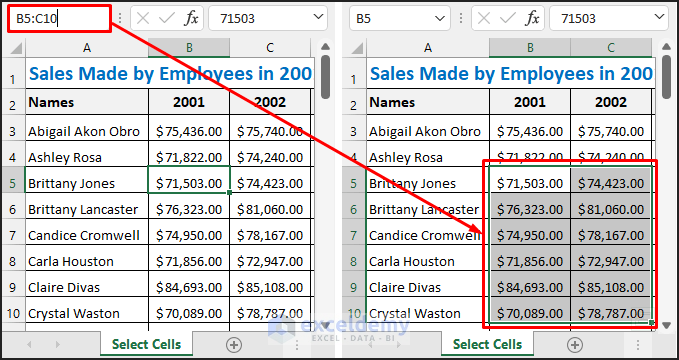
- If you enter B:B or C:C then the entire column B or column C will be selected respectively. Entering B:D will select columns B to D. Now enter 4:4 or 5:5 and rows 4 or 5 will be selected respectively. Similarly, entering 4:10 will select rows 4 to 10.
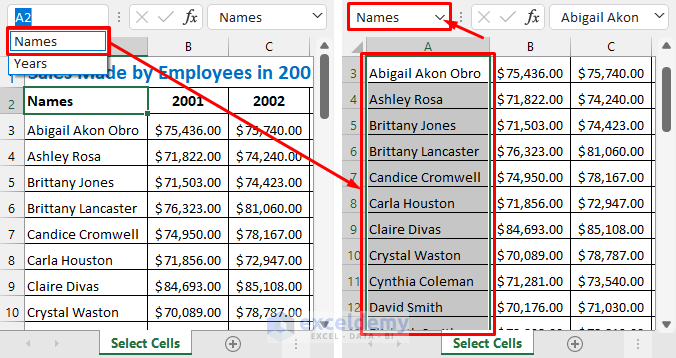
- You can also select a defined range using the Name Box. Click on the dropdown arrow in the Name Box and choose the name of the desired range or list.
Method 4 – Select a Range of Cells with SHIFT + Select
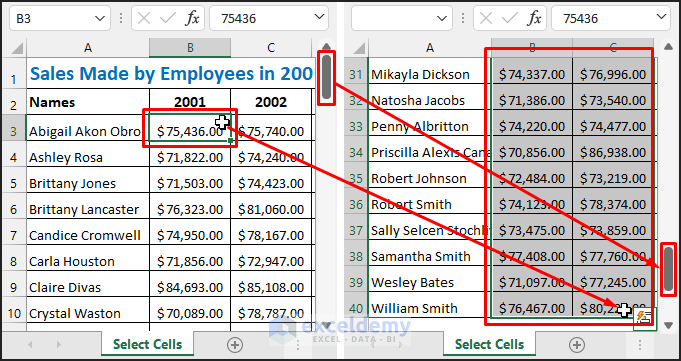
- Select the first cell of the range. For example, select cell B3.
- Scroll through the data.
- Hold the SHIFT key and select the last cell of the range (let’s say cell C40).
- The entire range of cells (B3:C40) will be selected.
Method 5 – Select Multiple Ranges of Cells with CTRL + Select
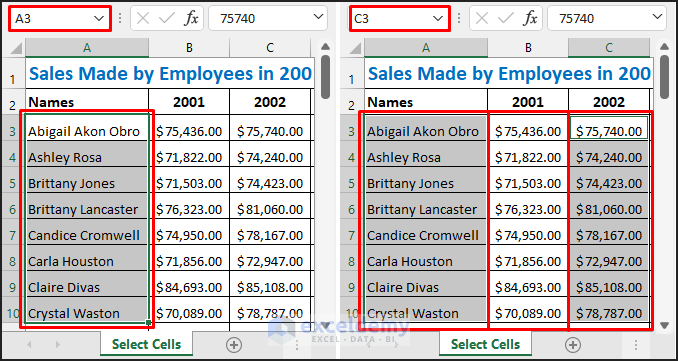
- Select range A3:A10.
- Hold the Ctrl key and select range C3:C10.
- Ranges A3:A10 and C3:C10 will be selected as follows.
Method 6 – Select Rows or Columns of Cells in Excel
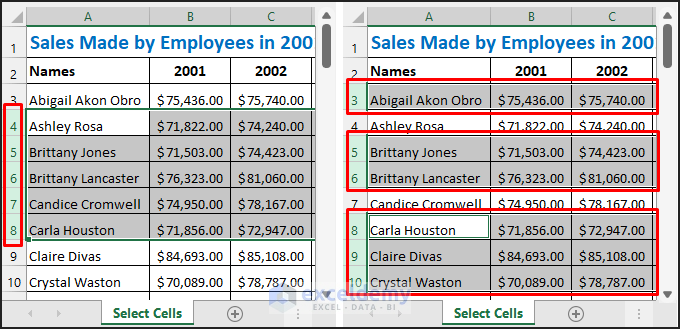
- You can easily select single or multiple rows of cells by selecting the row numbers at the left of each row. To select non-adjacent rows, hold the CTRL key and then select the desired rows.
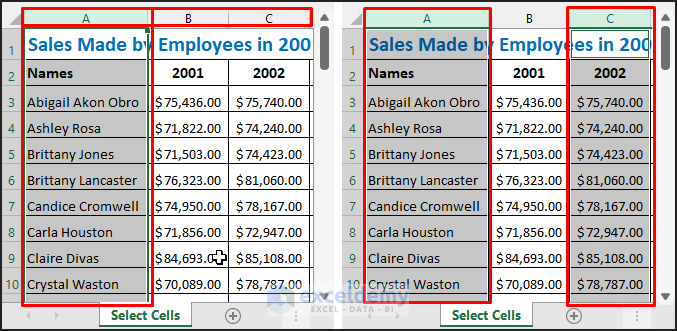
- You can use the column numbers at the top of each column to select single or multiple columns of cells.
Method 7 – Select a Range of Cells with the Go To Command
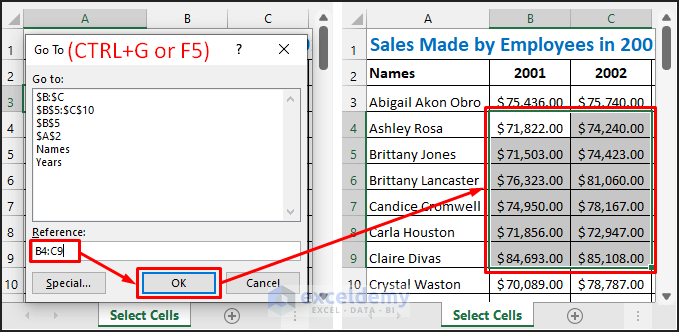
- Press F5 or Ctrl + G to open the Go To command.
- Enter the reference (B4:C9) of the desired range of cells and hit the OK button.
- Then the range will be selected as follows.
Method 8 – Select All Cells in the Worksheet in Excel
- Select the arrow at the intersection of row numbers and column numbers at the upper left corner to select all the cells in a worksheet.
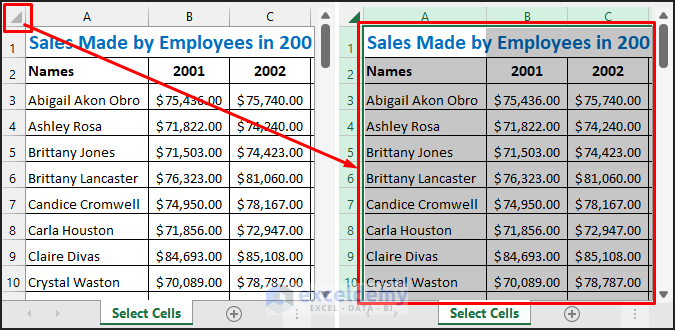
- Press Ctrl + A to select all the cells of a blank worksheet. Use the shortcut twice if the worksheet has data in it.
Method 9 – Select a Range of Cells with Excel VBA
Steps
- Press Alt + F11 (on Windows) or Opt + F11 (on Mac) to open the Microsoft Visual Basic for Applications (VBA) You can also open it from the Developer tab.
- Select Insert >> Module to open a blank module.
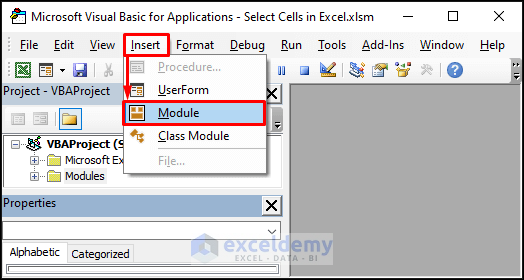
- Copy the following code:
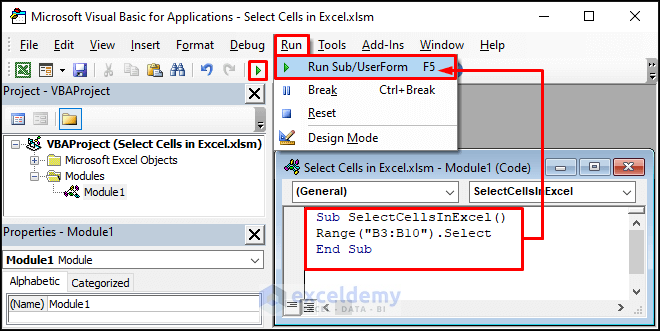
Sub SelectCellsInExcel()

Range("B3:B10").Select

End Sub- Paste the copied code on the blank module.
- Run the code using the triangular icon or the Run tab.
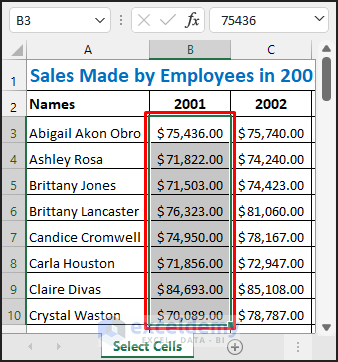
- The selected range will look as shown below. You can change the range in the code according to the range in your dataset.
Things to Remember
- Make sure to use the proper arrow while applying the Ctrl + Shift + ⬇ shortcut. If you don’t press the SHIFT key, it will take you to the last used cell instead of selecting them.
- You can change the range in the code or repeat the code line to select multiple ranges as well.
Download Practice Workbook
You can download the practice workbook from the download button below.
Select Range in Excel: Knowledge Hub
<< Go Back to Excel Range | Learn Excel
Get FREE Advanced Excel Exercises with Solutions!

