Dataset Overview
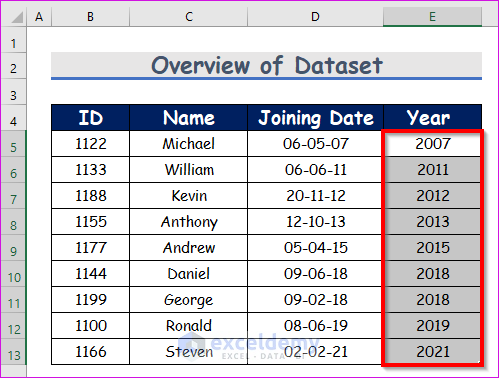
Let’s consider a dataset of employees with their ID, Name, Joining Date, and Year. Here’s an overview of the dataset that we’ll use to demonstrate the 4 methods:
Method 1 – Sorting Dates with Excel’s YEAR Function and Sort & Filter Command
Step 1
- Select cell E5.
- Enter the following formula:
=YEAR(D5)- Where D5 is the serial_number of the YEAR function. The YEAR function will return the year of that date.
- Press Enter to get the year format for the date (e.g., 2019).
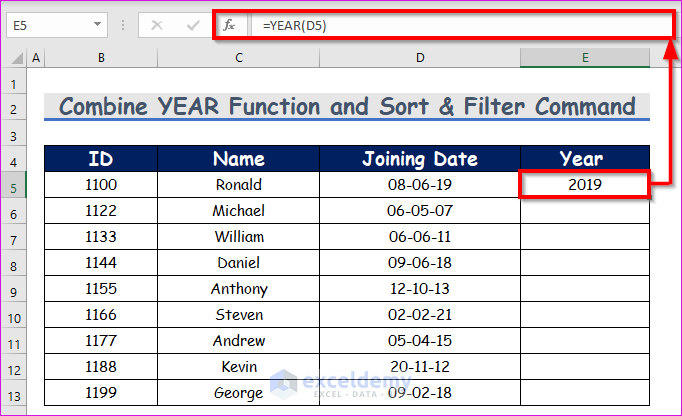
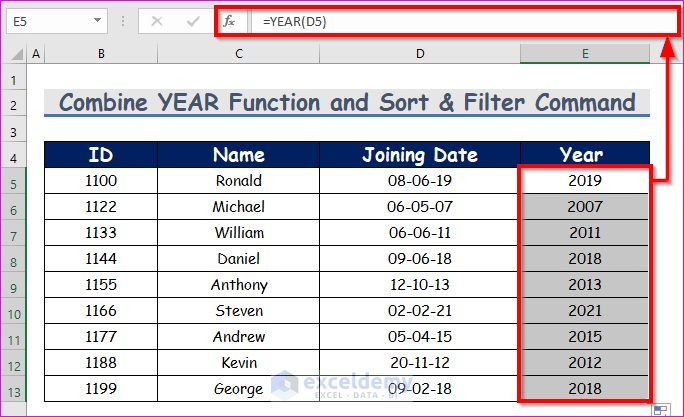
- AutoFill the YEAR function for the remaining cells in column E.
Step 2
- Select the cell range from E5 to E13.
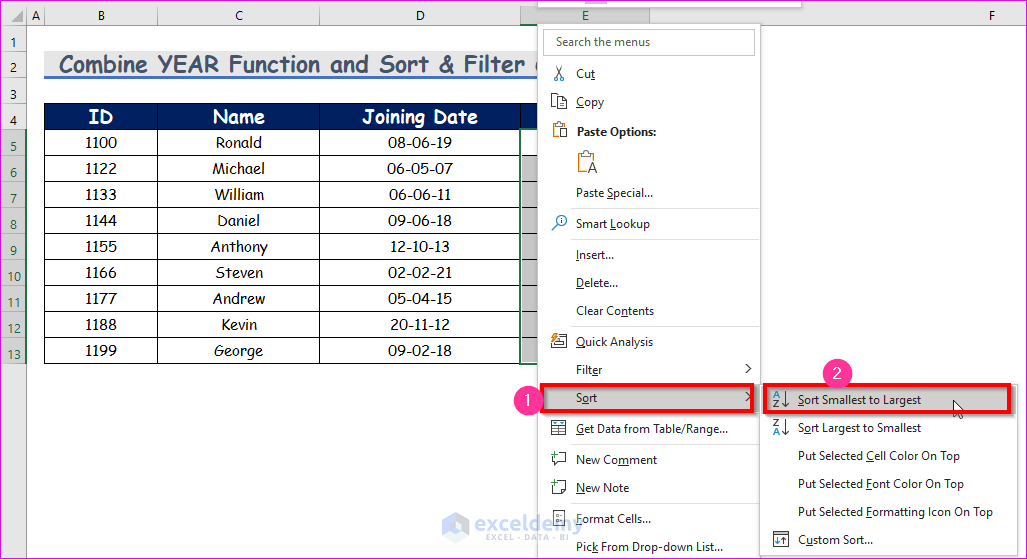
- Go to the Home tab and choose Sort Smallest to Largest from the Sort & Filter drop-down list under the Editing option.
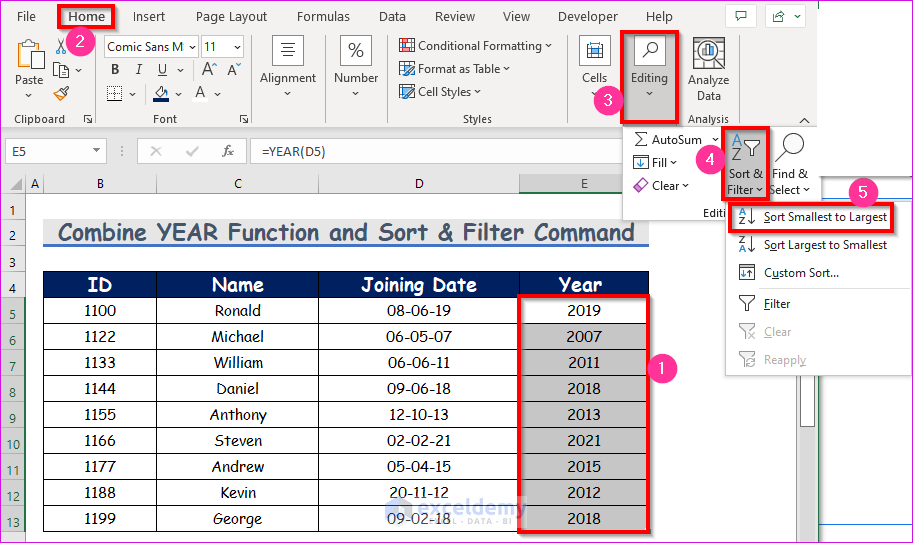
- Alternatively, right-click on the selected cells and choose Sort. Then select Sort Smallest to Largest (for ascending order).
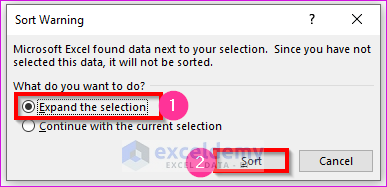
- In the Sort Warning dialog box, select Expand the Selection and click the Sort button.
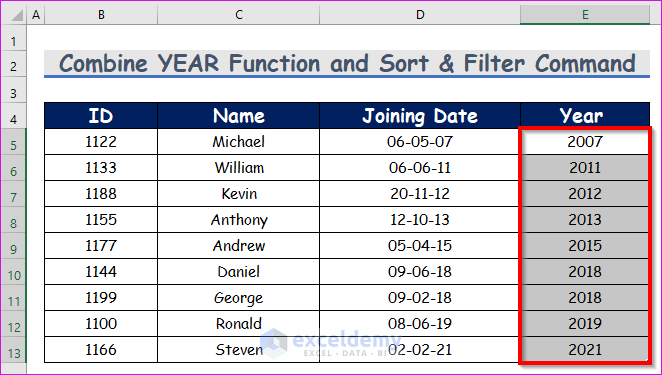
- The dates will be sorted by year.
Read More: How to Sort by Month in Excel
Method 2 – Applying SORTBY Function to Sort Dates by Year Without Mixing Data
Overview of the SORTBY Function
The syntax of the function is:
SORTBY (array, by_array, [sort_order], [array/order], ...)The arguments:
array -> This is a required argument, and it is for sorting the range or array.
by_array -> This is another required argument, and this indicates the range or array to sort by.
sort_order -> This is an optional argument. Only for sorting orders. 1 = ascending (default), -1 = descending.
array/order -> Another optional argument. Additional array and sort sequence pairs.
Steps
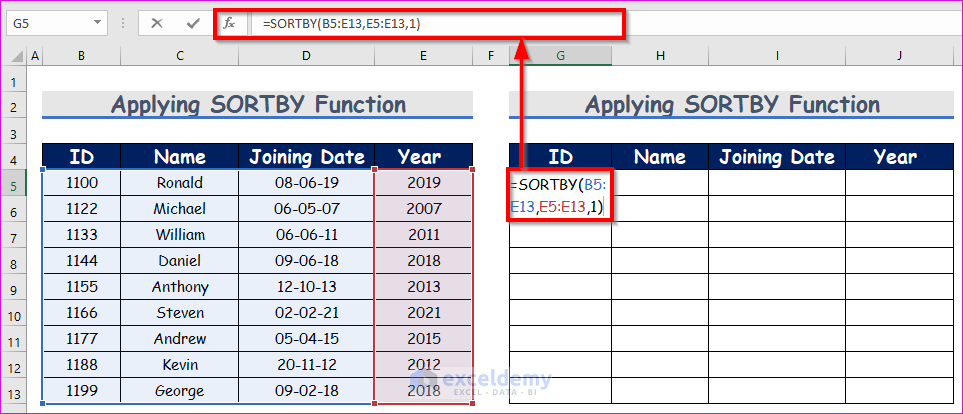
- Create a similar heading as shown in the screenshot.
- Select cell G5 for convenience.
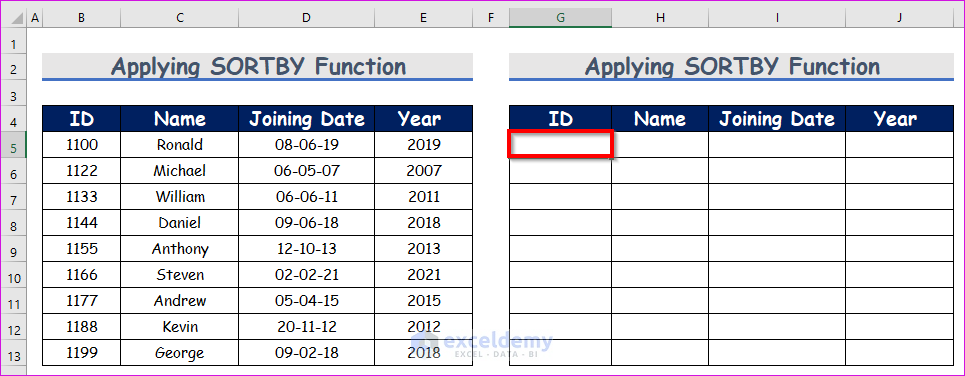
- Enter the SORTBY function:
=SORTBY(B5:E13,E5:E13,1)Formula Explanation:
Here,
-
- B5:E13 represents the range to be sorted (employee information).
- E5:E13 is the range of years for sorting.
- 1 is used for ascending sorting.
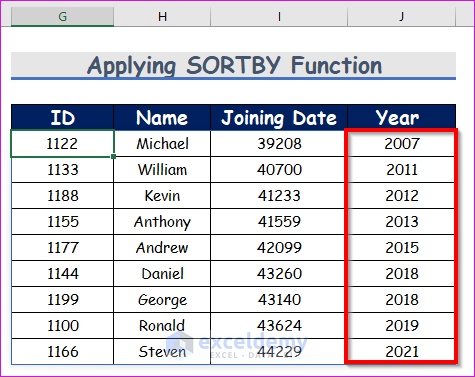
- Press Enter to get the sorted data.
Method 3 – Using Advanced Filter Tool to Sort Dates by Year in Multiple Columns
Steps
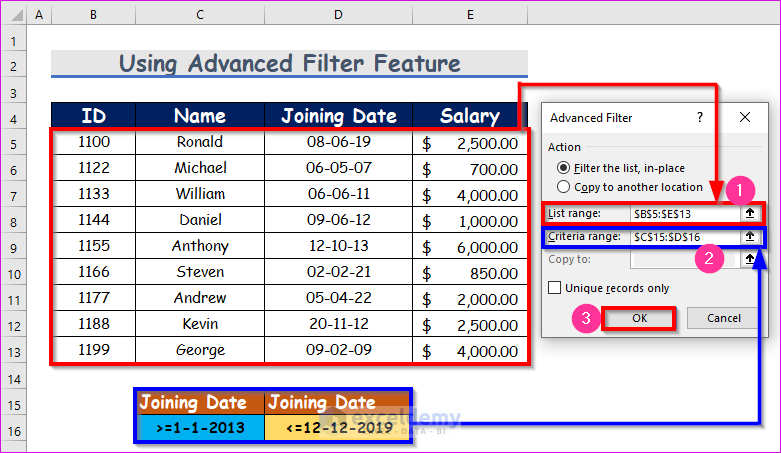
- From the Data tab, go to Data, select Sort & Filter and choose Advanced.

- In the Advanced Filter dialog box:
- Select data range $B$5:$E$13 in the List range drop-down box.
- Choose data range $C$15:$D$16 in the Criteria range drop-down box.
- Click OK.
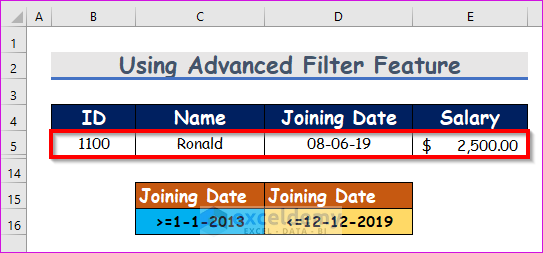
- You’ll get the sorted result based on the specified condition (joining dates between 1-1-2013 and 12-12-2019).
Read More: How to Sort by Date in Excel
Method 4 – Sorting Dates by Year with Excel Sort Command (Chronological Order)
This method is the easiest way to sort your data.
Steps
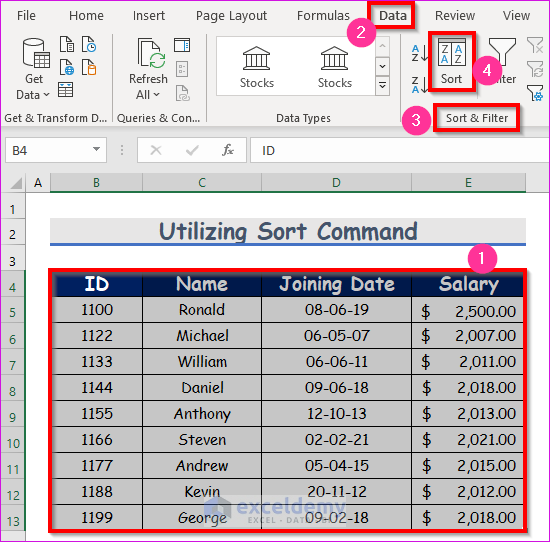
- Select the Table Range
- First, select the table range from cell B4 to E13.
- Access the Sort Command
- Go to the Data tab.
- Under the Sort & Filter group, click on Sort.
- Configure the Sort Dialog Box
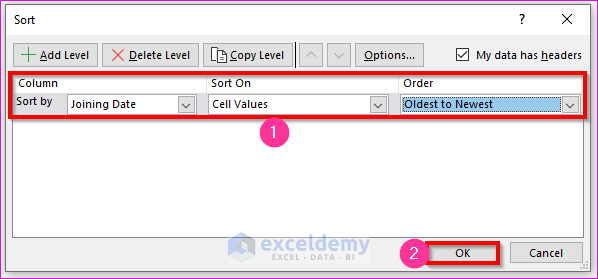
- The Sort dialog box will appear.
- In the Sort by drop-down box, select Joining Date.
- Under Sort On, choose Cell Values.
- Customize the order according to your preference. For chronological sorting, select Oldest to Newest.
- Press the OK button.
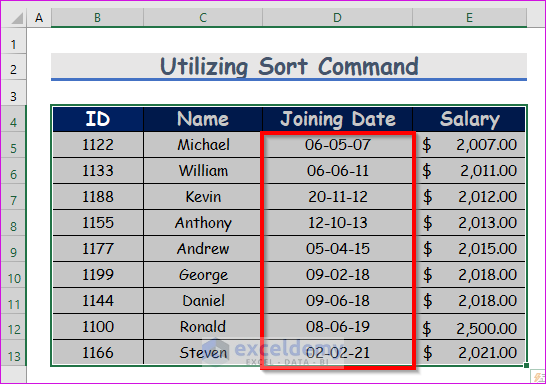
- Result
- Your data will now be sorted by year.
Notes: Sort by Date Not Working in Excel
If your dates are inserted in Text format in Excel, the Sort by Dates feature will not work as expected.
Read More: How to Sort Dates in Excel by Month and Year
Download Practice Workbook
You can download the practice workbook from here:
Related Articles
- How to Sort Birthdays in Excel by Month and Day
- How to Sort by Date and Time in Excel
- How to Sort Dates in Chronological Order in Excel
<< Go Back to Sort by Date in Excel | Sort in Excel | Learn Excel
Get FREE Advanced Excel Exercises with Solutions!

