Method 1 – Insert FIND Function find_text Argument
- Find the first space position number; type the find_text argument.
=FIND(" ",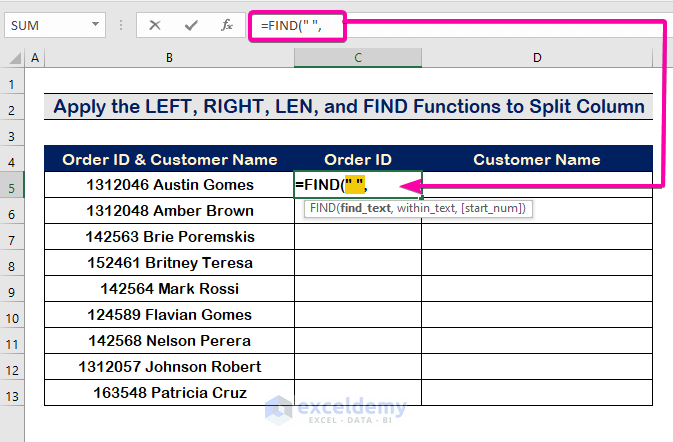
Method 2- Enter FIND Function within_text Argument
- The first space in cell B5; write the within_text argument with the following formula.
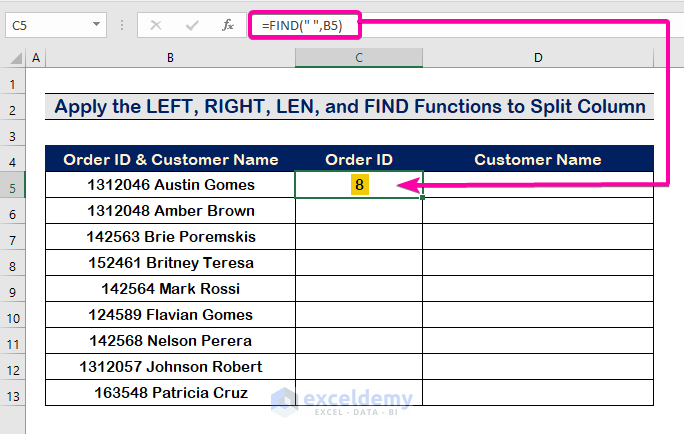
=FIND(" ",B5)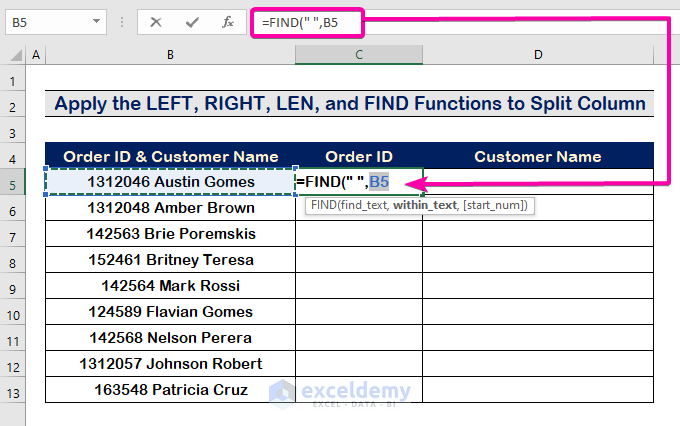
- Press Enter to see the position of the first space from the left. It results in 8, as the image is shown below.
Method 3 – Apply LEFT Function to Split Column by First Space
- Write the LEFT function text argument as B5 with the following formula.
=LEFT(B5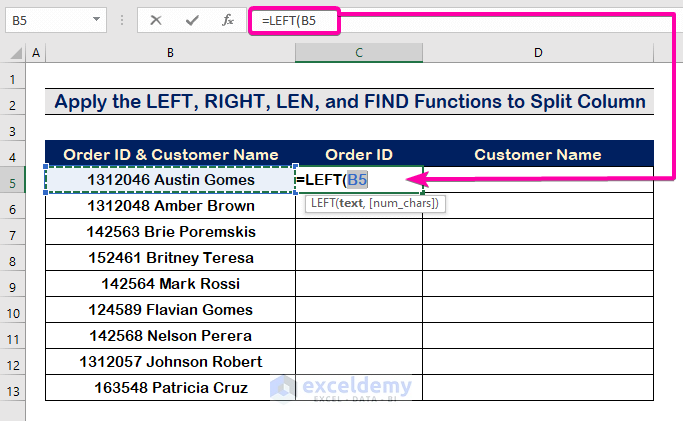
- Insert [num_chars] argument using the FIND function value of Step 2.
=LEFT(B5,FIND(" ",B5)-1)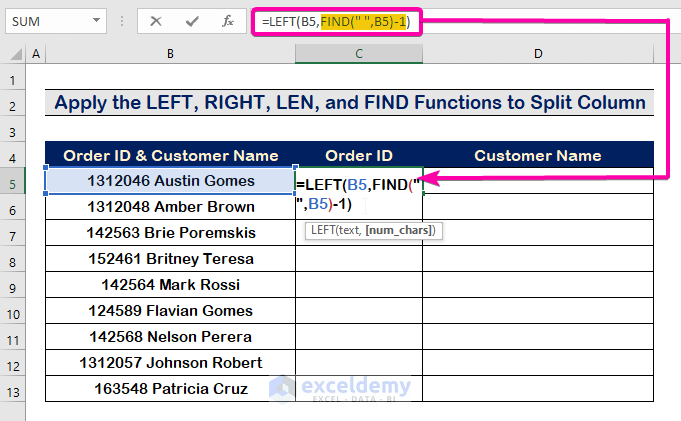
- It will result in the Order ID before the first space.
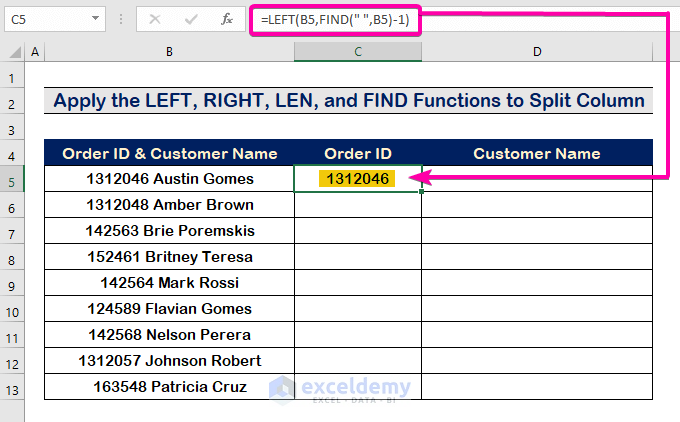
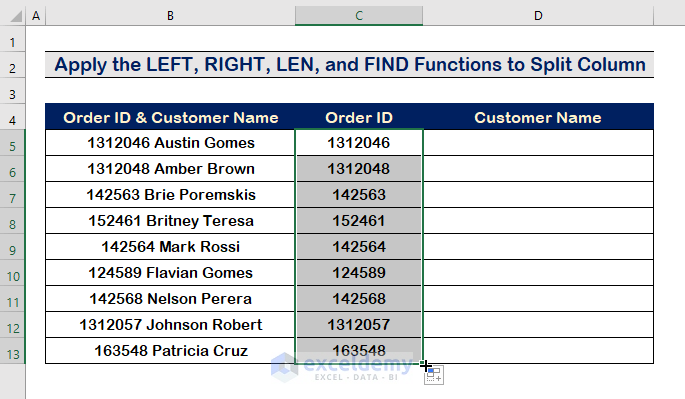
- Use the AutoFill Handle Tool to auto-fill the cells.
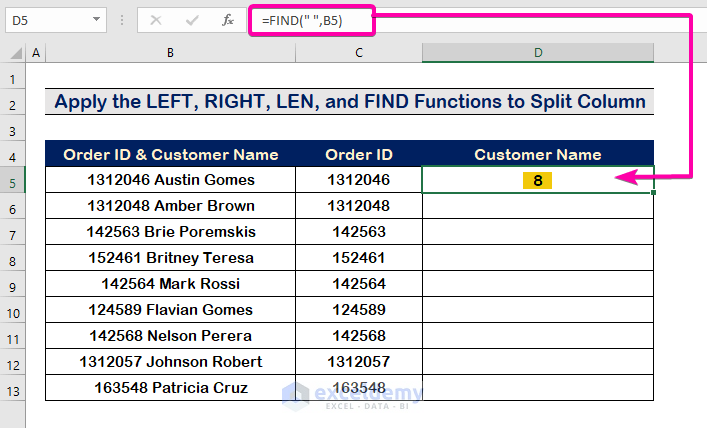
Method 4 – Enter FIND Function to Find Space
- Type the following formula to find the space from the left.
=FIND(" ",B5)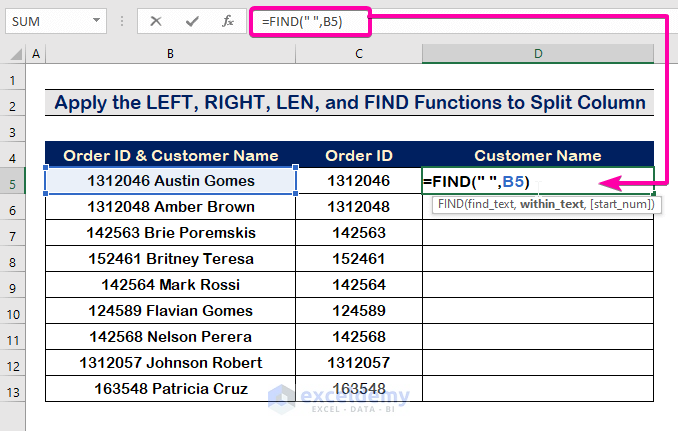
- It will display as 8 because the first space is in the 8th position from the left.
Method 5 – Use LEN Function
- Use the LEN function to count the total number of characters, and subtract the result of the FIND function to find the location of the first space from the right.
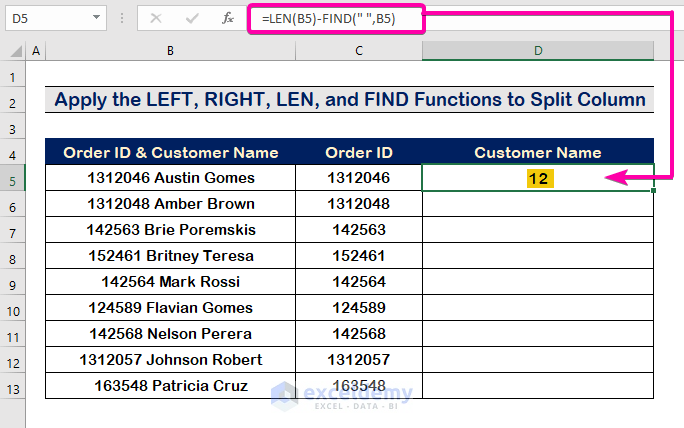
=LEN(B5)-FIND(" ",B5)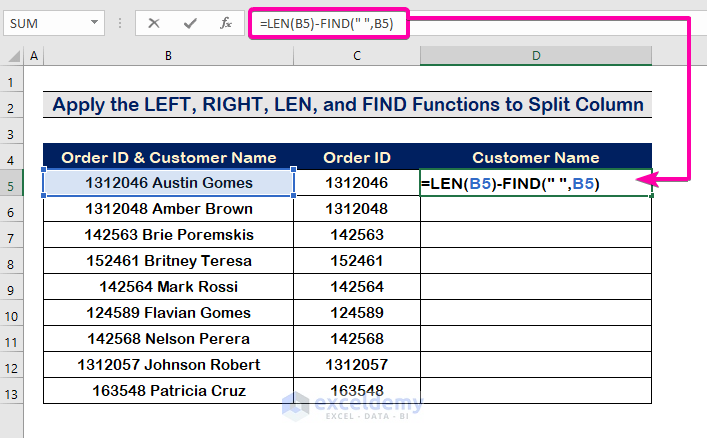
- It will result in 12 as the first space is 12th characters away from the right side.
Method 6 – Apply RIGHT Function to Split Column by First Space
- Enter the RIGHT function text argument to extract the value from cell B5 with the following formula.
=RIGHT(B5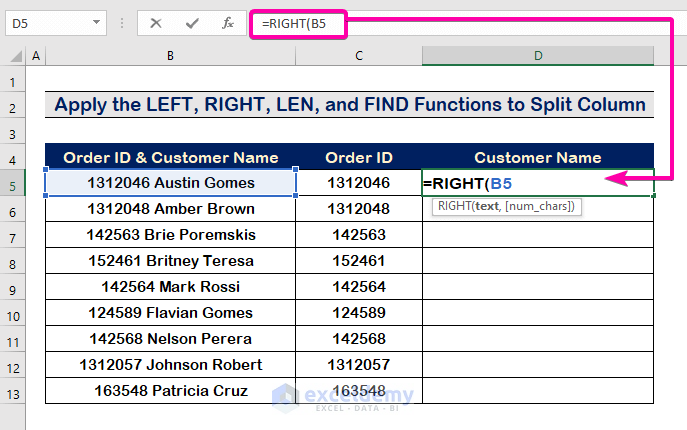
- Use the result from Step 5 as the [num_chars] argument of the RIGHT function.
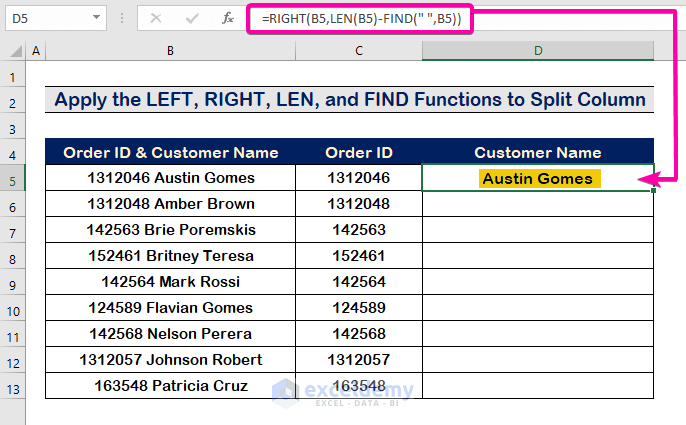
=RIGHT(B5,LEN(B5)-FIND(" ",B5))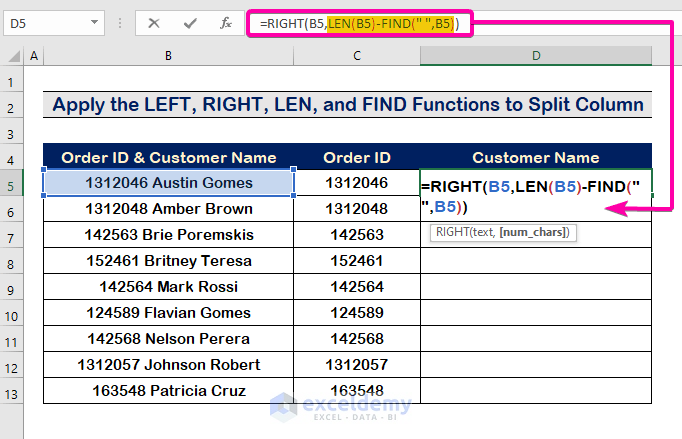
- Press Enter to see the result from the right side, and it will show the Customer Name.
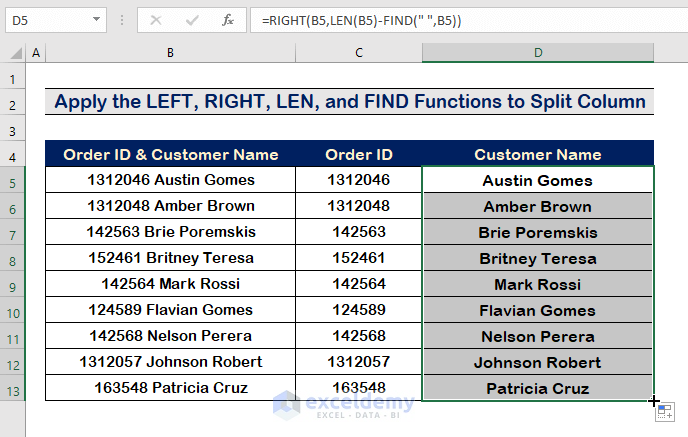
- Apply the AutoFill Handle Tool to fill the required cells.
Download Practice Workbook
Download this practice workbook to exercise while you are reading this article.
Related Articles
- How to Split One Column into Multiple Columns in Excel Formula
- Split Date and Time Column in Excel
- How to Split Column in Excel by Comma
- Split Column in Excel by Word


This is a really excellent tutorial.
Very clearly laid out.
Thank you so much.
I had been given an excel spreadsheet of library books with author and title in a single cell. The author was always followed by a colon but the title also could contain additional colons. Thus the “tesxt to columns” function split the title field into multiple columns that I then had to re-merge.
Your solution solved the problem for me – Thank you so much!
Hi DAVID,
Thank you very much for your appreciation. Follow our website ExcelDemy for other problems, and hope you will always get the best solutions.