Step 1: Setting Up Format
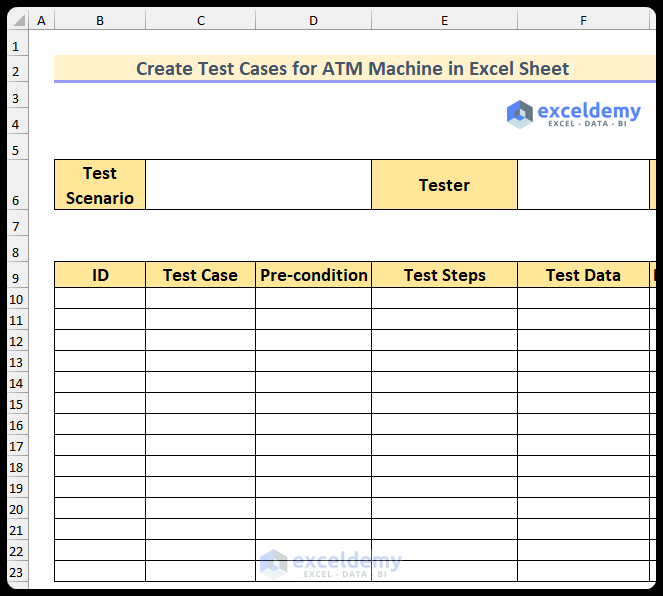
- Create the following fields –
- Test Scenario: The test scenario for the test cases.
- Tester: The person responsible for the testing process.
- Create the following columns –
- ID: A unique identification number for each test case.
- Test Case: The subject for a test procedure.
- Pre-condition: If there is any prerequisite for a test case.
- Test Steps: Required test steps to carry out a test case.
- Test Data: If any data needs to be entered.
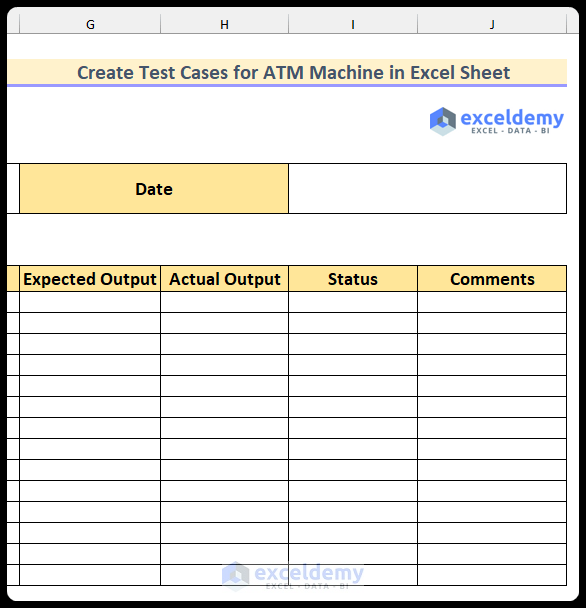
- Insert more columns –
- Date: The date when the test is carried out.
- Expected Output: The most likely output.
- Actual Output: The real output.
- Status: Pass, Skip or Fail.
- Comments: If a tester needs to make comments.
Read More: How to Write Test Cases in Excel Sheet
Step 2: Entering Relevant Data
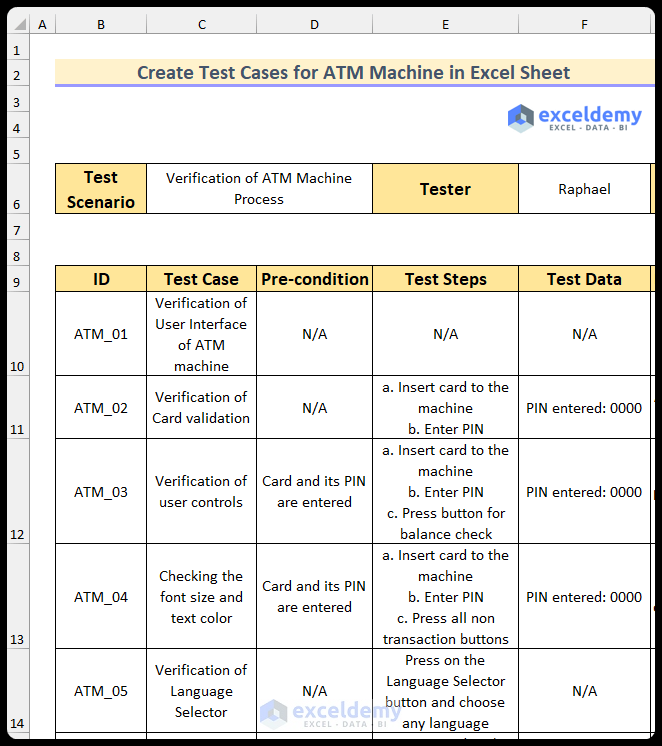
- Enter the values into the empty cells.
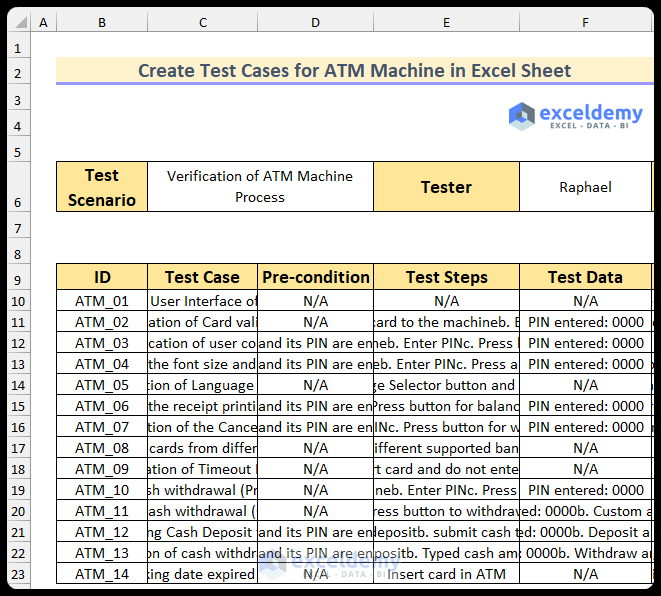
- Select the cell range.
- Go to the Home tab, select Wrap Text in Alignment.
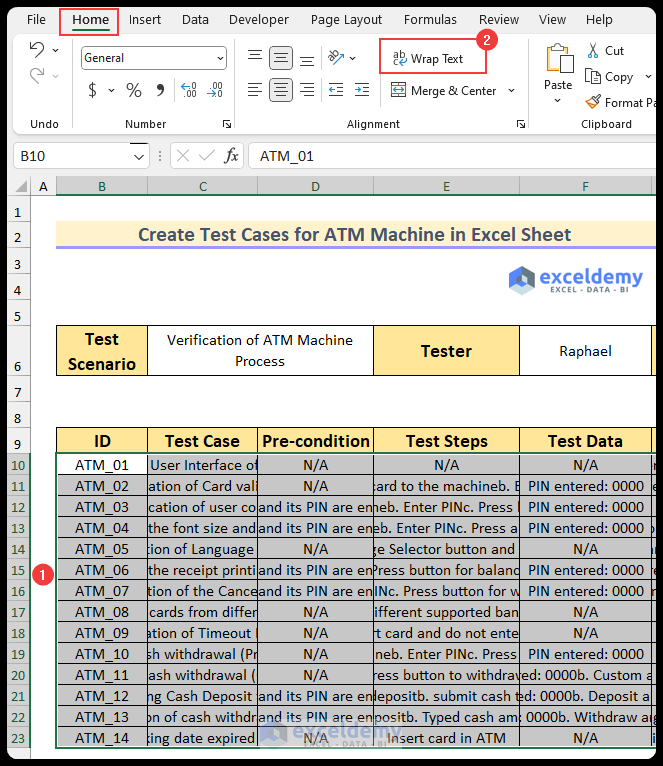
Data is adequately displayed.
Read More: Test Cases for Banking Application in Excel Sheet
Step 3 – Finding the Test Status
- Enter the following formula in I10.
=IF(OR(G10=H10,H10="As expected"),"Pass","Fail")
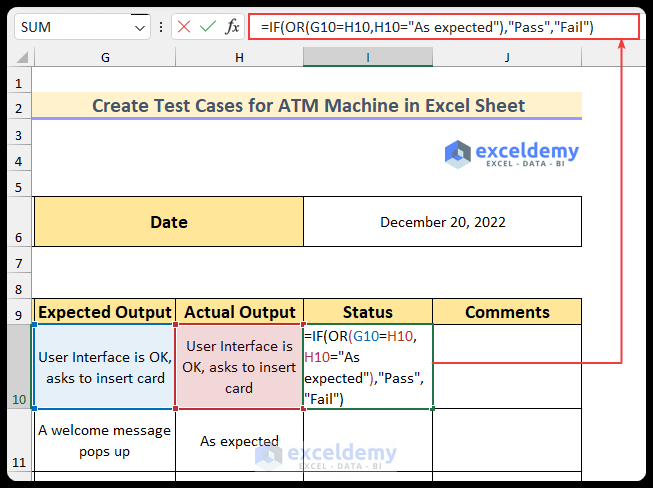
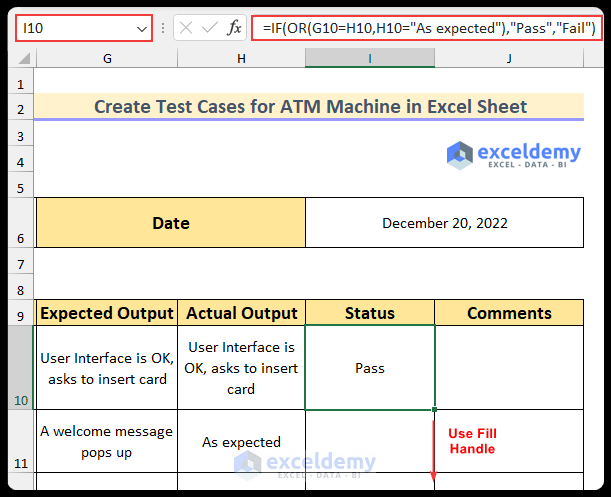
- Press Enter.
Formula Breakdown
- OR(G10=H10,H10=”As expected”)
- Output: True.
- This function checks whether the value of G10 is equal to H10 or the value H10 is equal to “As expected”.
- The formula reduces to -> IF(TRUE,”Pass”,”Fail”)
- Output: Pass.
- As the condition is true, the formula returns its first portion.
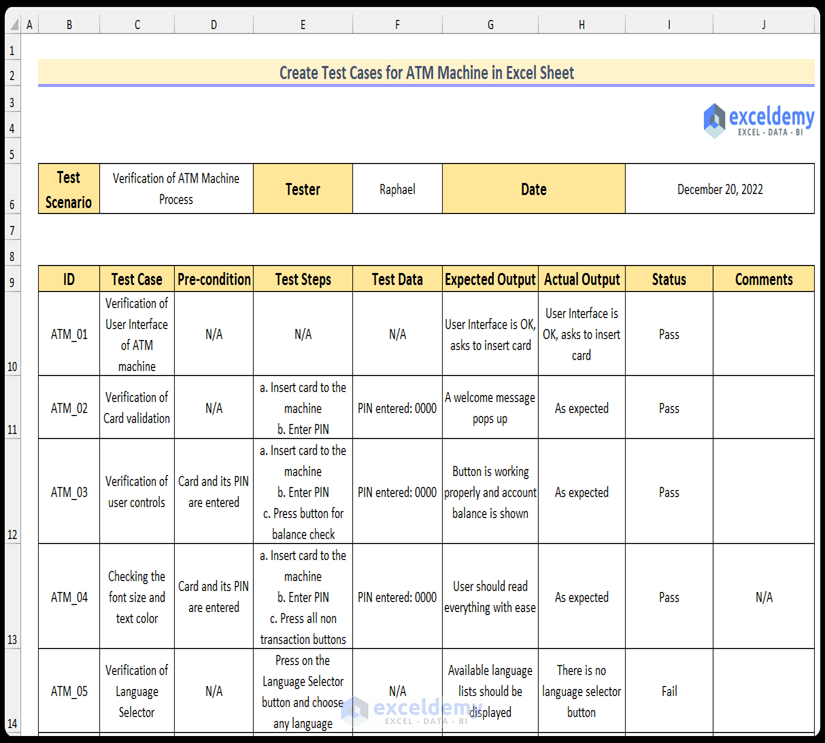
- Drag down the Fill Handle to see the result in the rest of the cells.
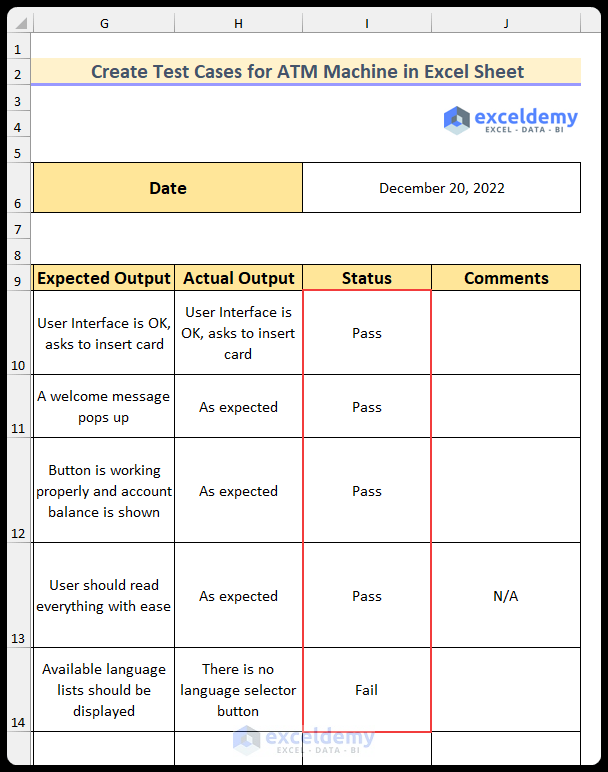
This is the output.
Read More: Test Cases for E-Commerce Website in Excel
Download Practice Workbook
Download the Excel file here.
Related Articles
- Prepare Test Cases for Gmail in Excel Sheet
- How to Create Test Cases for Registration Form in Excel Sheet
- Create Test Cases for Login Page in Excel Sheet
- How to Export Test Cases from ALM to Excel
<< Go Back to Excel Test Cases Template | Excel Templates
Get FREE Advanced Excel Exercises with Solutions!

