Step 1 – Setting Up the Format
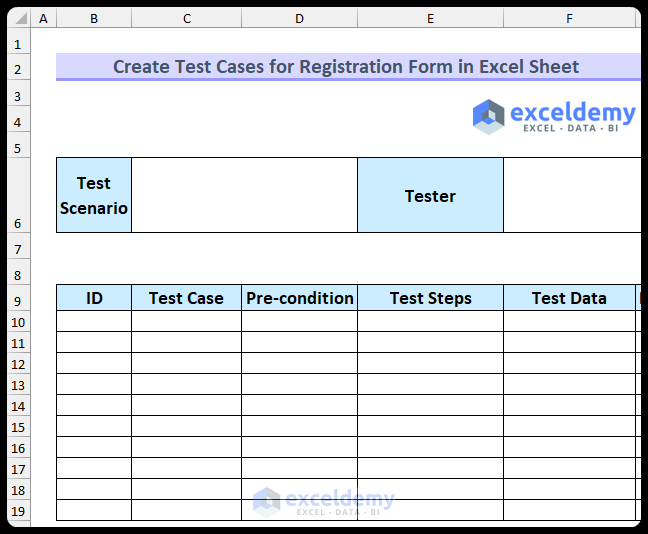
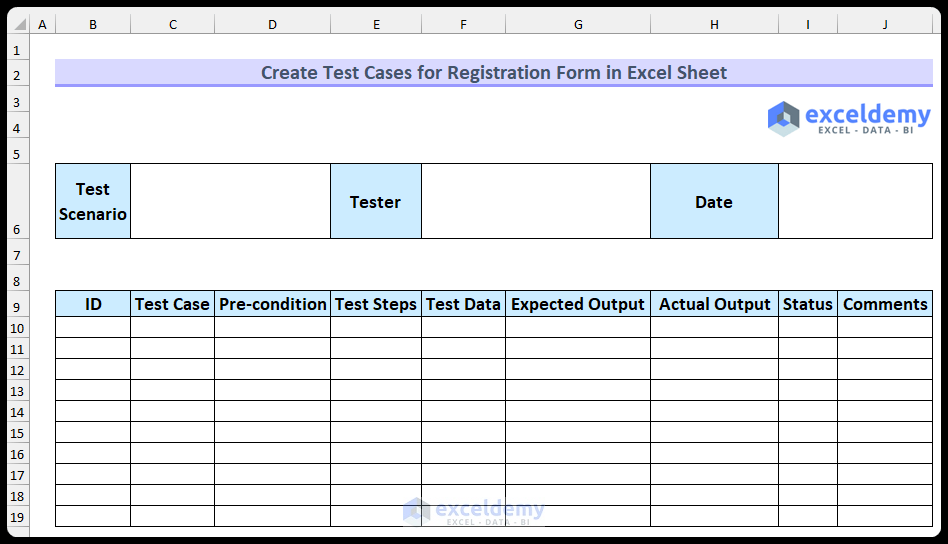
There will be ten columns in this template.
- Create the following fields –
- Test Scenario: the test scenario for the test cases.
- Tester: the person responsible for the testing process.
- Create the following columns –
- ID: assign a unique identification number for each test case.
- Test Case: the subject for the test procedure.
- Pre-condition: existing pre-requisites for the test case.
- Test Steps: steps to carry out the test case.
- Test Data: data that needs to be entered.
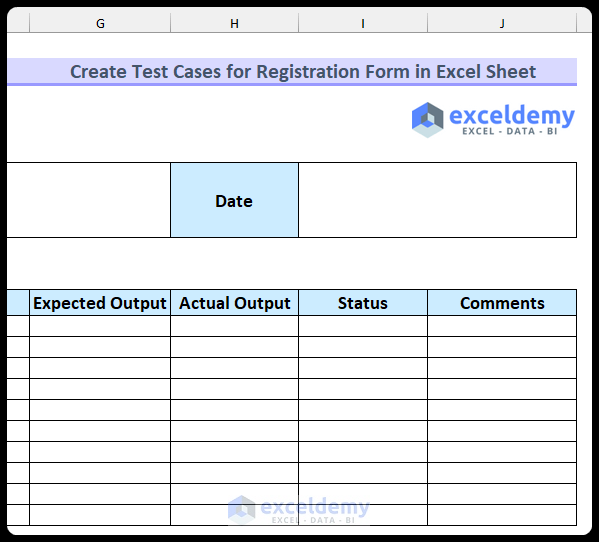
- Insert more columns –
- Date: the date of the test.
- Expected Output: the most likely output.
- Actual Output: the real output.
- Status: Pass, Skip or Fail.
- Comments: tester’s comments.
Read More: Prepare Test Cases for Gmail in Excel Sheet
Step 2 – Entering Relevant Data
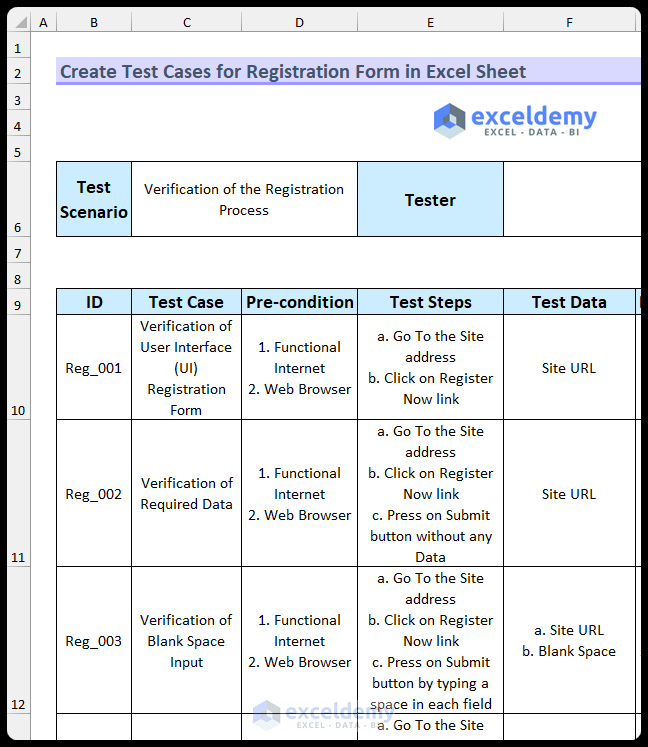
- Enter the values into the empty cells.
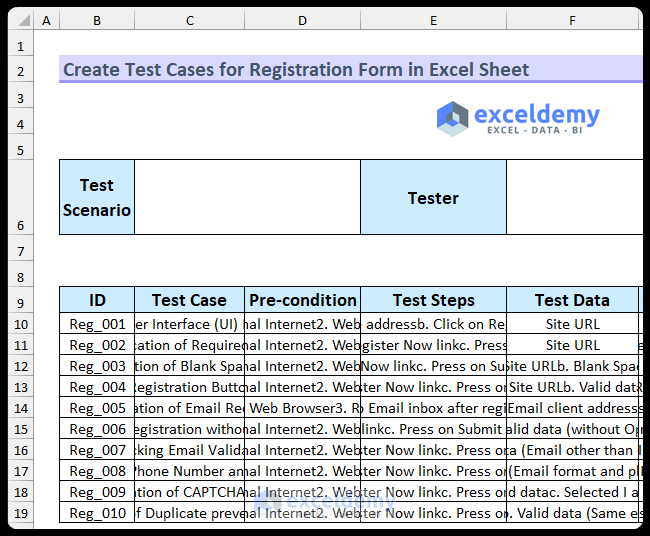
- Select the range shown in the image below.
- Go to the Home tab.
- In Alignment, select Wrap Text .
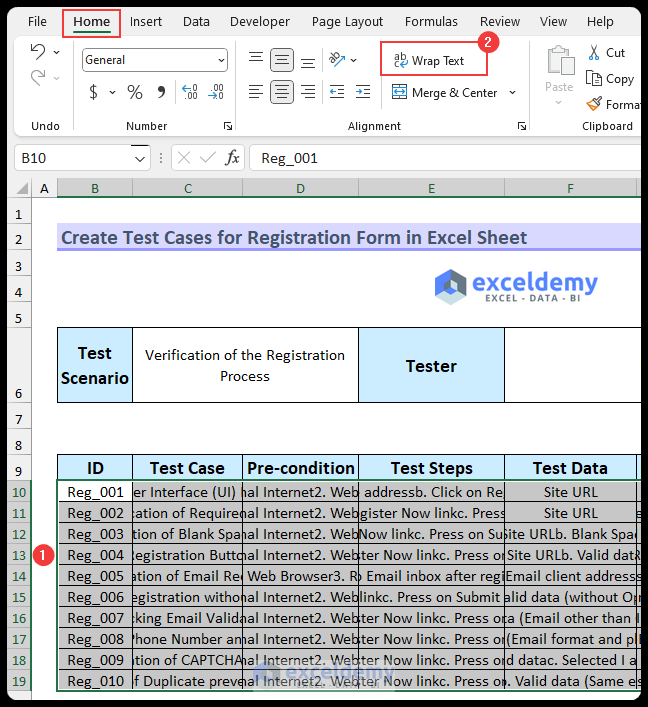
Data will be displayed.
Read More: Test Cases for E-Commerce Website in Excel
Step 3 – Finding the Test Status
- Enter the following formula in I10.
=IF(OR(G10=H10,H10="As expected"),"Pass","Fail")
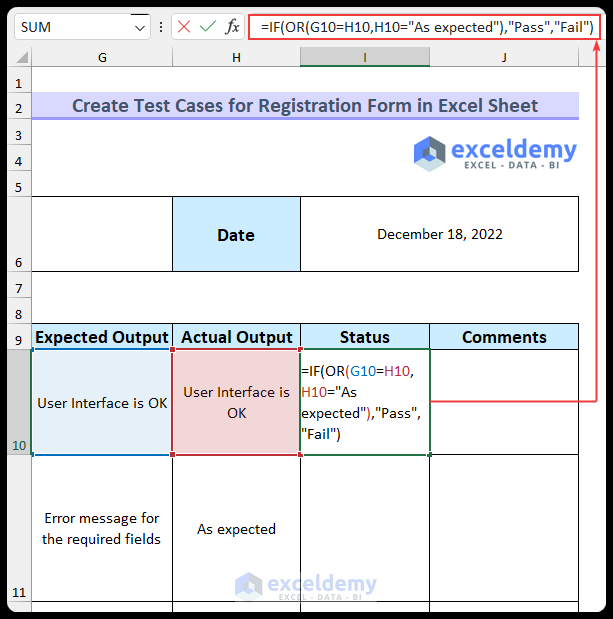
- Press Enter.
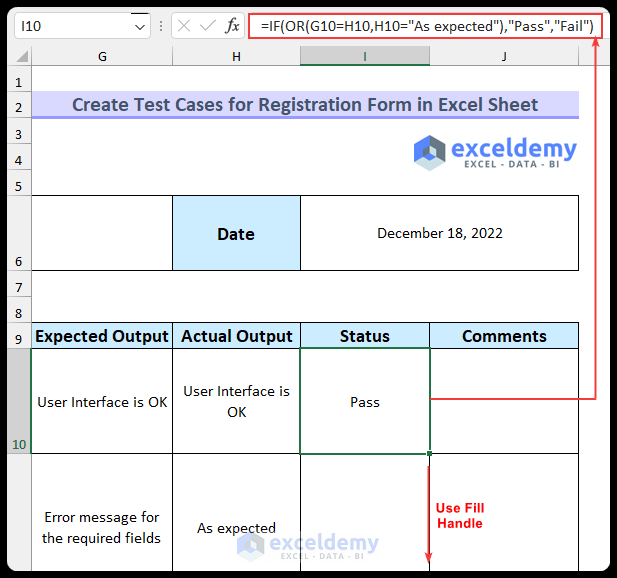
Formula Breakdown
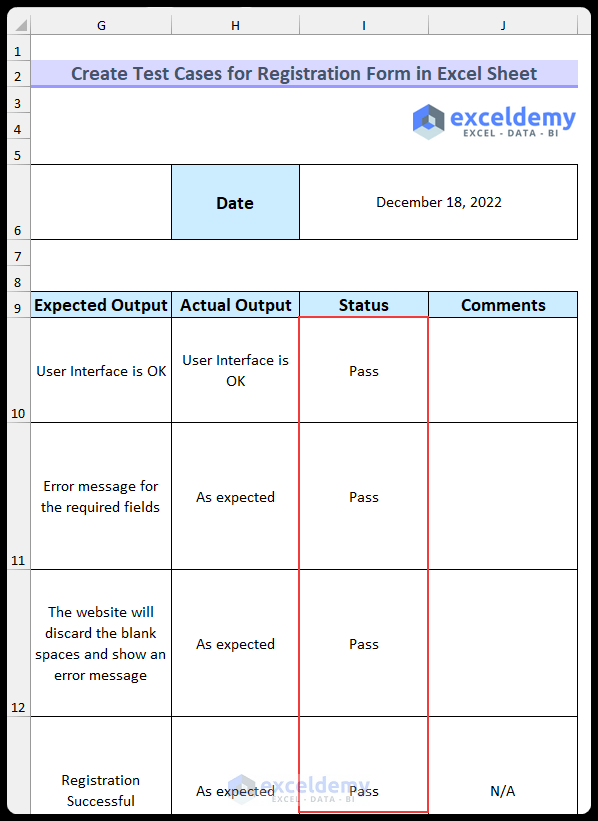
- Drag down the Fill Handle to see the result in the rest of the cells.
Read More: Test Cases for Banking Application in Excel Sheet
Create Test Cases for a Login Page in Excel Sheet
Steps:
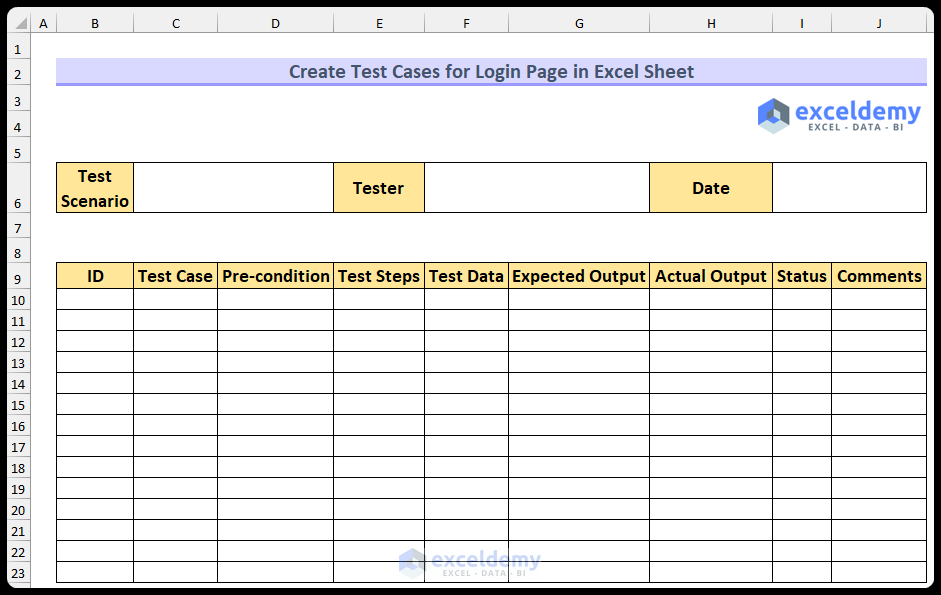
- Prepare the template to enter the test cases.
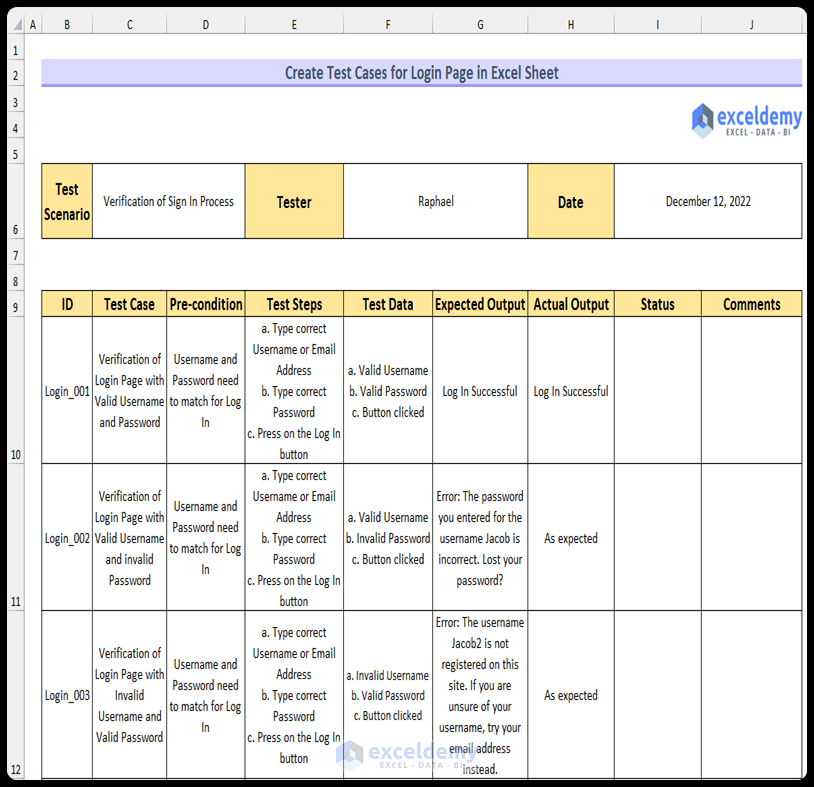
- Enter relevant values in the cells.
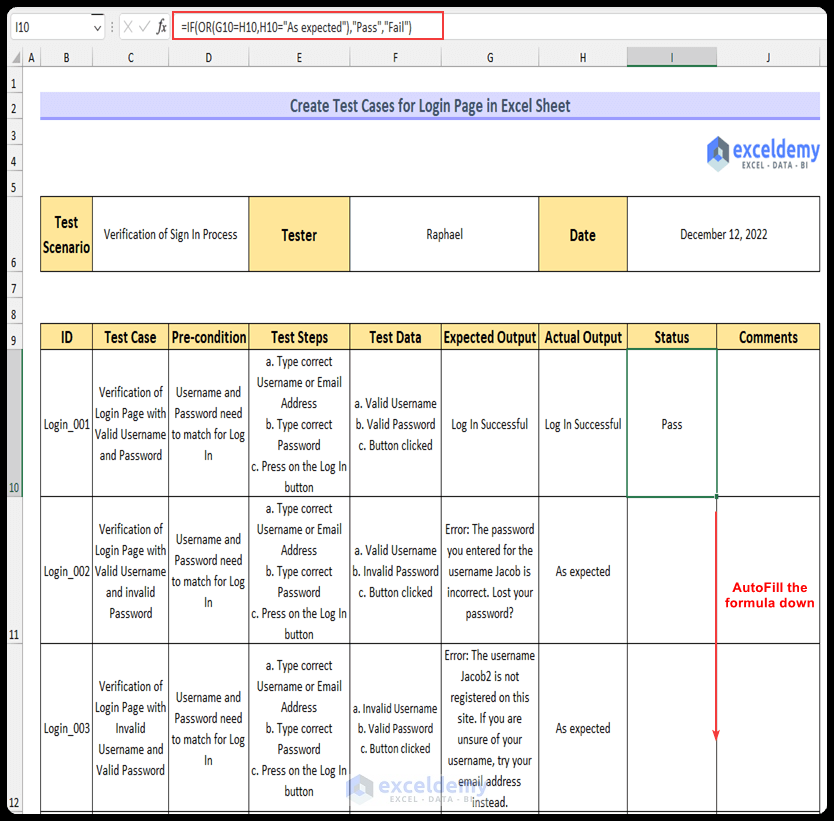
- Enter this formula in I10 to return the test status. (The formula is the same as the one used in the registration form)
=IF(OR(G10=H10,H10="As expected"),"Pass","Fail")
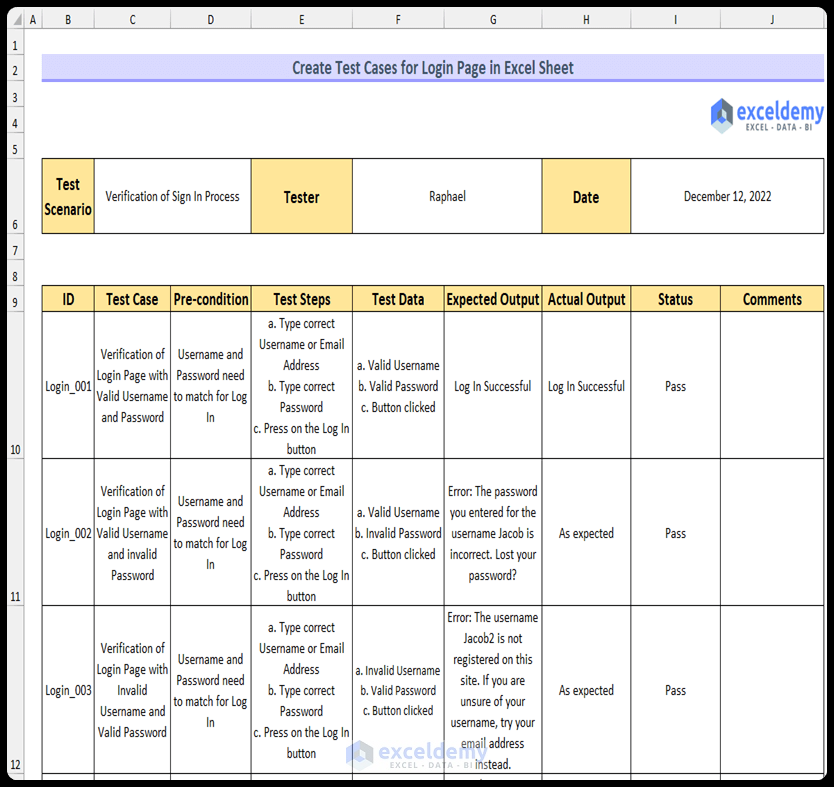
- Drag down the Fill Handle to see the result in the rest of the cells.
Practice Section
Practice with this template.
Download Practice Workbook
Download the Excel file here.
Related Article
<< Go Back to Excel Test Cases Template | Excel Templates
Get FREE Advanced Excel Exercises with Solutions!

