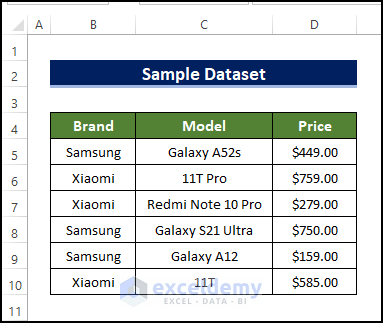
Consider the following dataset where we have various smartphones and their information listed. We’ll copy this data to other sheets.
Method 1 – Apply the Paste Link Option in Excel for Transferring Data Automatically
In the following picture, the Dataset worksheet is representing the specifications of a number of smartphone models.

And here is the Paste Link worksheet where three columns from the Dataset sheet have been extracted. The Price column has not been copied yet, and we will auto-update the price column if any change is made in the corresponding column in the first sheet (Dataset).
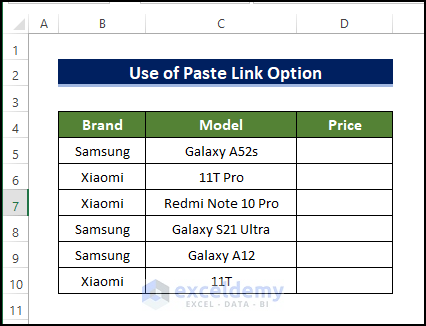
We can link these two worksheets so that data in one worksheet (Paste Link) will be auto-populated based on another worksheet (Dataset).
Case 1.1 – Within the Same Workbook
Steps:
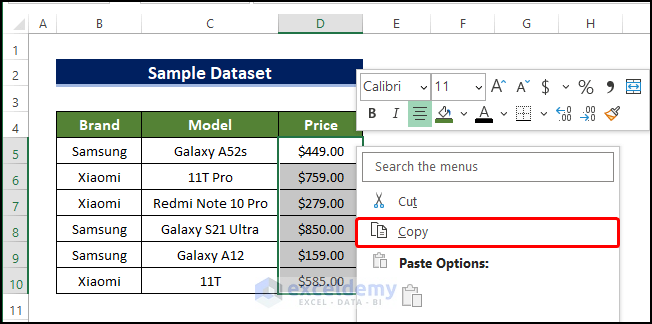
- From the Dataset worksheet, select the range of cells (D5:D10) containing the prices of the smartphones and right-click on it.
- Select Copy from the context menu to copy the selected range of cells.
- Go to the Paste Link worksheet.
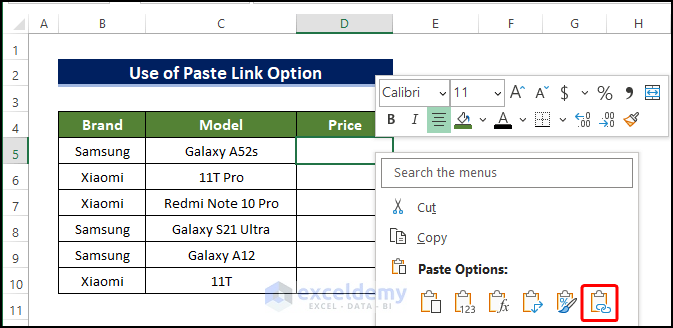
- Select the first output cell in the Price column.
- Right-click and choose the Paste Link option.
- The Price column is now complete with the extracted data from the first sheet (Dataset).
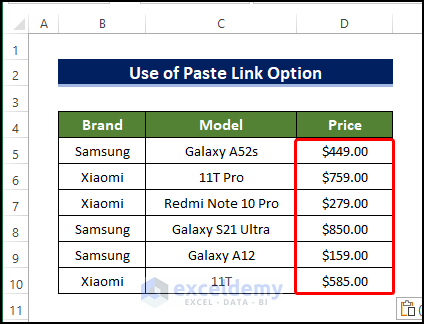
- Let’s see how a change of data in the primary worksheet (Dataset) auto-populates data in the second worksheet (Paste Link).
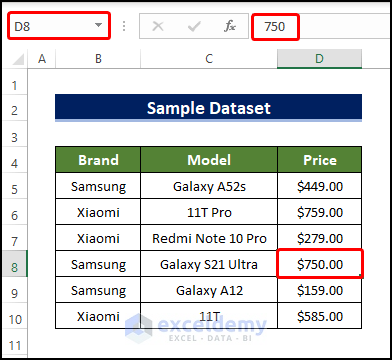
- In the Dataset worksheet, change the price value of any smartphone model. For example, change the cell value in cell D8 from 850 to 750.
- Press Enter and go to the Paste Link worksheet.
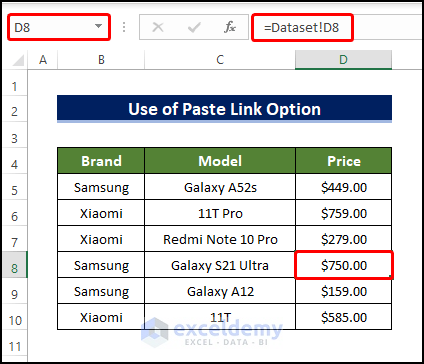
- You’ll find the updated price of the corresponding smartphone in the Paste Link worksheet is also changed from 850 to 750.
Read More: How to Automatically Update One Worksheet from Another Sheet in Excel
Case 1.2 – Across Different Workbooks
Steps:
- Open both workbooks at the same time. The Price column values are going to be transferred to the new workbook.
- We have only the Brand and Price columns in the destination dataset.
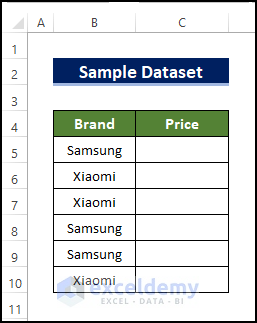
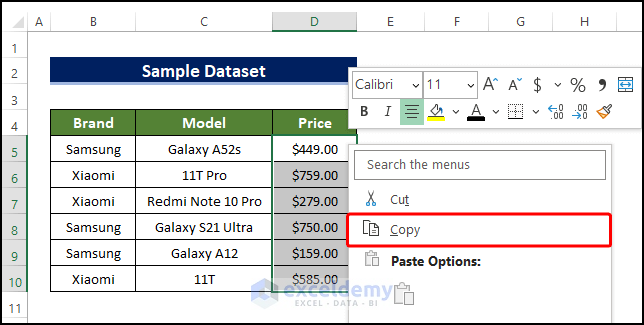
- Select the range of cells D5:D10 and then right-click.
- From the context menu, select Copy to copy the range of cells to the clipboard.
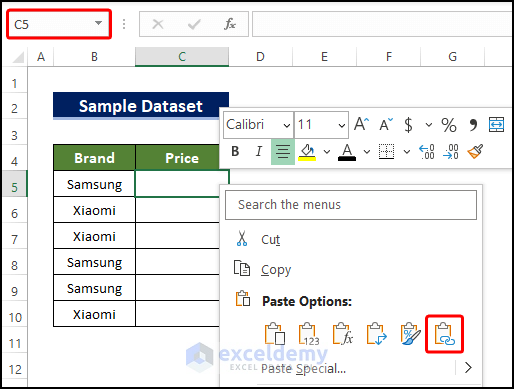
- Move to the destination workbook and select cell C5.
- Right-click, then click on the Paste Link icon.
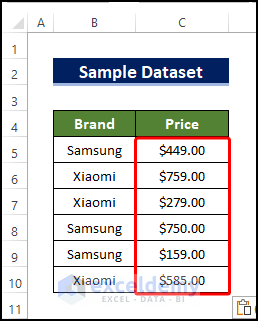
- Clicking the Paste Link icon will paste and link the data saved in the range of cell in D5:D10 (Source Workbook) in the range of cell C5:C10 (Destination Workbook).
- If we change any data in the source dataset, then the new data is also going to be updated with it.
Method 2 – Transfer Data from One Sheet to Another with a Worksheet Reference
Steps:
- In the Worksheet Reference worksheet, select Cell D5 and put an Equal (=) sing. Do not press Enter yet.
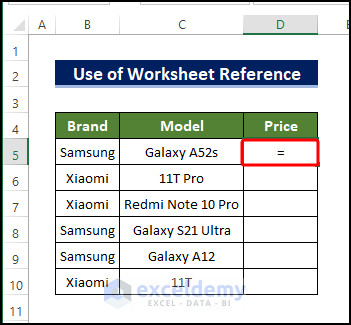
- Go to the Dataset worksheet.
- Select the range of cells (D5:D10) containing the prices of all smartphone models.
- Press Enter.
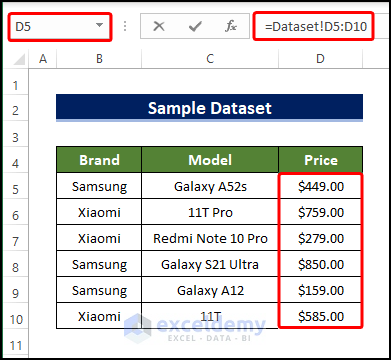
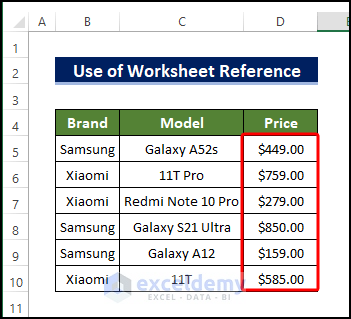
- In the Worksheet Reference worksheet, you’ll find an array of prices in column D ranging from D5 to D10.

- If you change any data in the Price column in Dataset worksheet, you’ll also see the updated price of the corresponding item in Worksheet Reference right away.
Read More: How to Reference Cell in Another Excel Sheet Based on Cell Value
Method 3 – Insert the Plus (+) Symbol to Move Data to Another Worksheet Automatically
Steps:
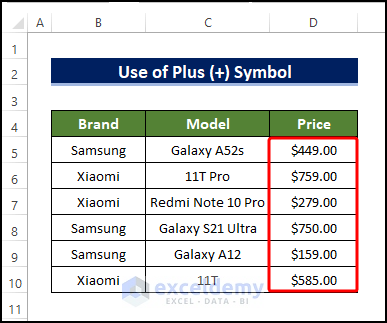
- Select the output cell D5 in the Plus Symbol worksheet.
- Start typing and input a Plus symbol (+) there only. Don’t press Enter now.
- Drag your mouse pointer to the Dataset sheet.
- Right-click and you’ll be redirected to the Dataset worksheet.
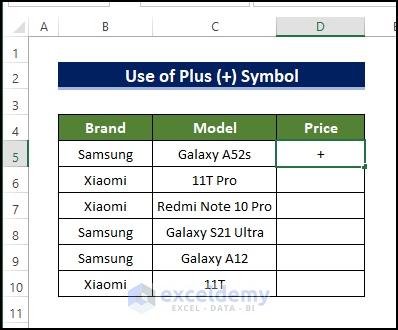
- In the Dataset worksheet, select the range of cells (D5:D10) containing the prices of all devices.
- Press Enter.
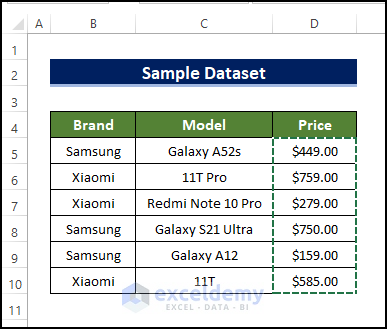
- You’ll find all prices under the Price column in the Plus Symbol worksheet. If you change the price of a smartphone device in the Dataset worksheet, it’ll automatically update the corresponding price in the Plus Symbol worksheet immediately.
Read More: How to Link Excel Data Across Multiple Sheets
Method 4 – Automatically Send Data to Another Worksheet Through Excel VBA
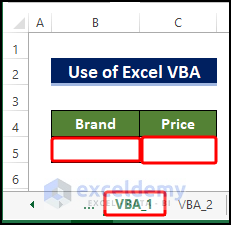
In the picture below, VBA_1 contains values in B4 and C4 respectively. We’ll type a smartphone model and its price in B5 and C5 first. Then we’ll transfer the input data from VBA_1 to VBA_2.
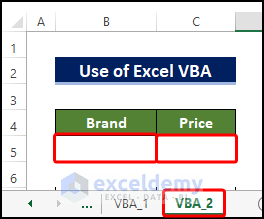
Here is the VBA_2 worksheet, where the list of smartphone models and the corresponding prices will be auto-populated from the VBA_1 worksheet.
Step 1 – Insert the Command Button
- Go to the Developer ribbon.
- From the Insert drop-down, select the first command button shown in a rectangular shape from the ActiveX Controls section.
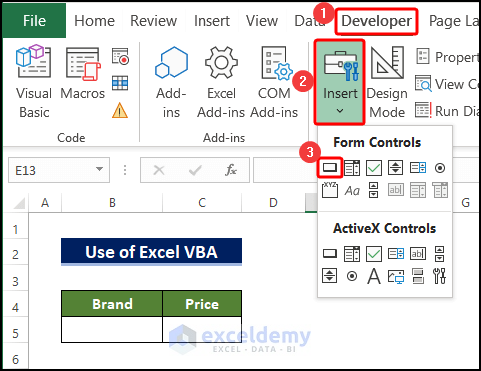
- Draw a rectangle with your mouse cursor and click to finalize its location.
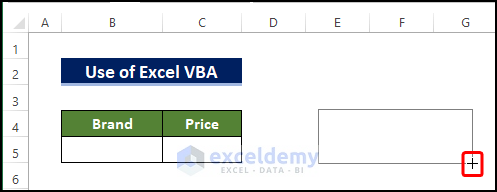
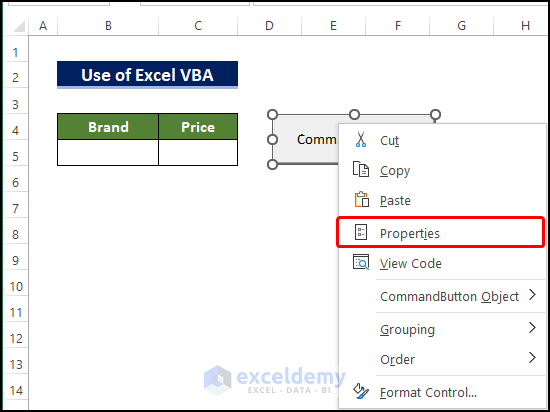
- You’ll see the command button as shown in the following screenshot for the example.
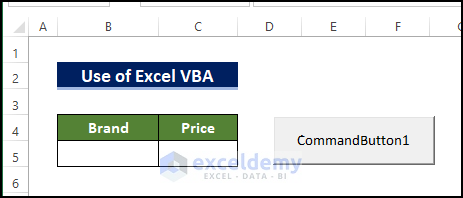
- To change the caption, right-click the mouse button.
- Select the option Properties.
- The default button caption can be changed to a custom one for better clarity.
- In the Caption box, assign the button with a name, let’s say Transfer to VBA_2 Sheet.
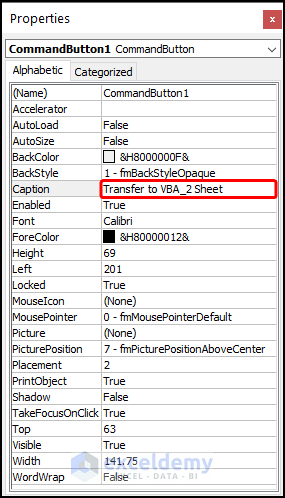
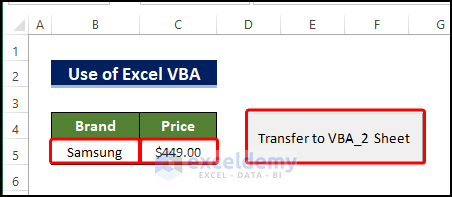
- Press Enter or click on the cross in the corner of the box. The caption is now Transfer to VBA_2 Sheet.
Step 2 – Assign a Macro to the Button
- Right-click on the Command Button and choose View Code from the context menu.
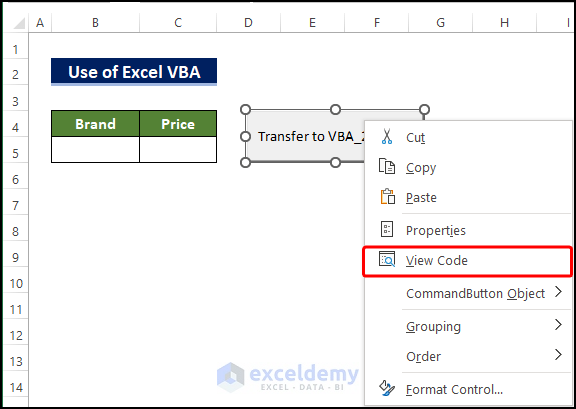
- The VBA window will appear.
- In the VBA module, paste the following code:
Option Explicit
Private Sub CommandButton1_Click()
Dim Smartphone As String, Price As String
Worksheets("VBA_1").Select
Smartphone = Range("B5")
Price = Range("C5")
Worksheets("VBA_2").Select
Worksheets("VBA_2").Range("B4").Select
If Worksheets("VBA_2").Range("B4").Offset(1, 0) <> "" Then
Worksheets("VBA_2").Range("B4").End(xlDown).Select
End If
ActiveCell.Offset(1, 0).Select
ActiveCell.Value = Smartphone
ActiveCell.Offset(0, 1).Select
ActiveCell.Value = Price
Worksheets("VBA_1").Select
Worksheets("VBA_1").Range("B5:C5").ClearContents
End Sub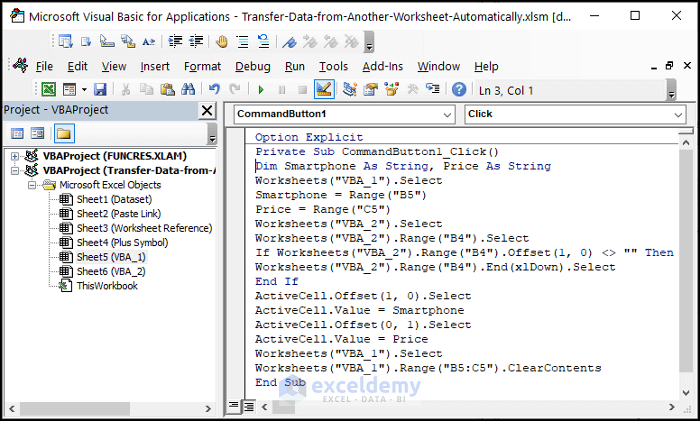
- Click on the Save icon and return to the VBA_1 worksheet.
Step 3 – Execute the Code to Transfer Data
- Type the name of a smartphone model and its price in the corresponding input cells.
- Click on the Transfer to VBA_2 command button.

- The input data is gone from the VBA_1 worksheet and is now in the VBA_2 dataset.
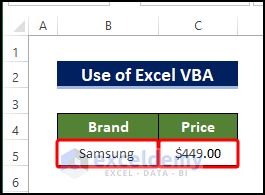
- Switch to VBA_2 worksheet and you’ll find your input data there under the corresponding headers.
- Go to the VBA_1 worksheet once again.
- Type the name of another smartphone device and its price.
- Press the command button on the right.
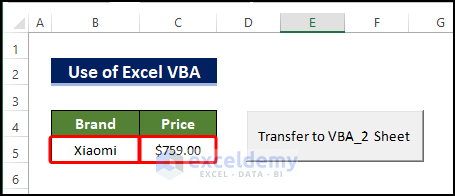
- Switch back to the VBA_2 worksheet and then you will notice that the new information is now right below the existing dataset.
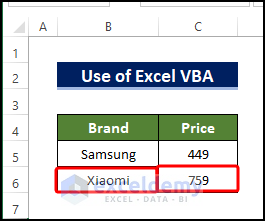
- The new information is added in a new row.
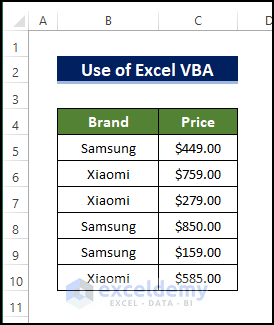
Read More: How to Transfer Data from One Sheet to Another in Excel Using Macros
Download the Practice Workbook
Related Articles
- Transfer Specific Data from One Worksheet to Another for Reports
- Linking Excel Sheets to a Summary Page
- How to Make Excel Look Like an Application
<< Go Back To Excel Link Sheets | Linking in Excel | Learn Excel
Get FREE Advanced Excel Exercises with Solutions!


Can this final method (#4) be easily expanded to incorporate more columns and rows? Would you be able to comment on what exactly the code is implementing?