Dataset Overview
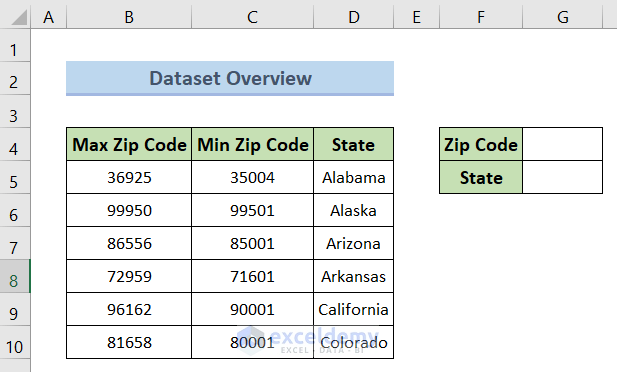
In this tutorial, we’ll work with a dataset containing the maximum and minimum zip codes for each state in the United States. The dataset has three columns: Max Zip Code, Min Zip Code, and State. The data spans from cells B4 to D10. Additionally, there are two cells where we’ll input a zip code, and Excel will return the corresponding state name.
Method 1 – Using the LOOKUP Formula
- Enter the zip code in cell G4.
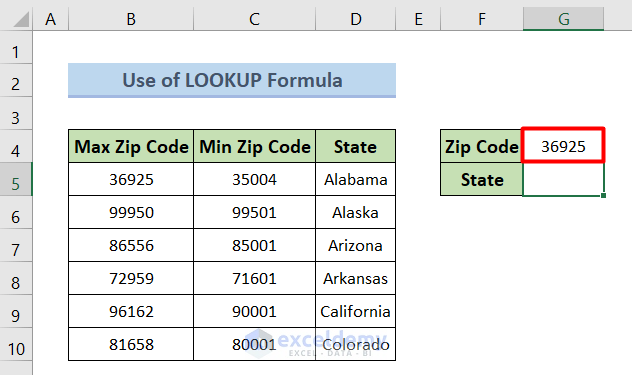
- Copy the following formula into cell G5:
=LOOKUP(2,1/($C$5:$C$10<=G4)/($B$5:$B$10>=G4),$D$5:$D$10)- Press Enter.
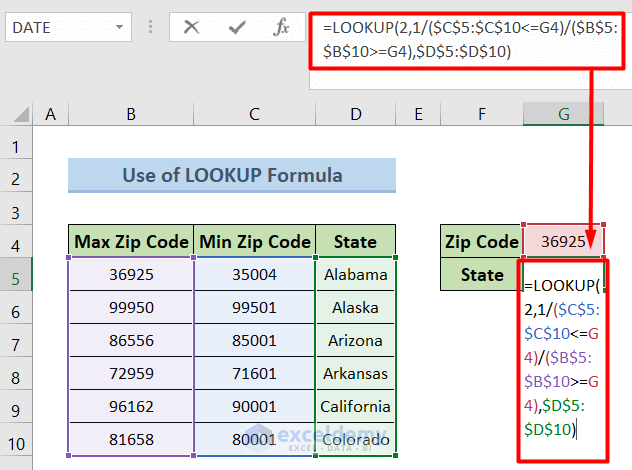
The LOOKUP function searches for the value 2. By applying logical conditions, it determines the lookup vector. Since we want to extract the state corresponding to the zip code, we set the range D5:D10 as the result vector.
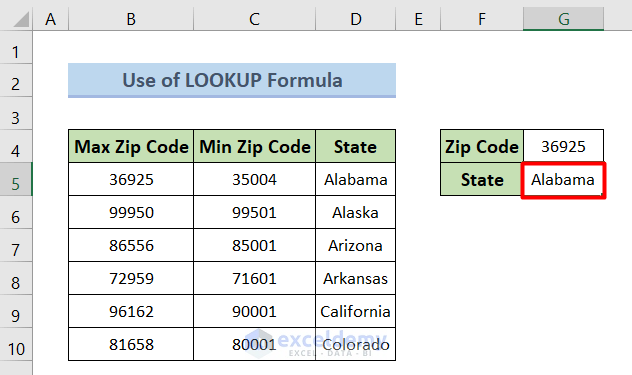
- We will find the following result:
Read More: How to Create Zip Code with Excel Formula
Method 2 – Using the VLOOKUP Function
- Enter the zip code in G4 and select cell G5.
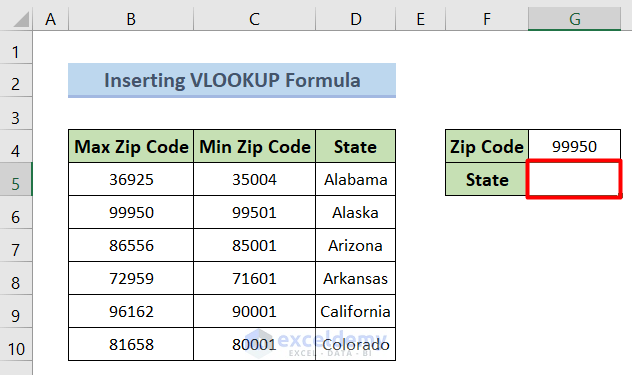
- Enter the following formula:
=VLOOKUP(G4,B5:D10,3,FALSE)The VLOOKUP function looks up the value in G4 within the range B5:D10. The column number 3 corresponds to the state names, and FALSE ensures an exact match.
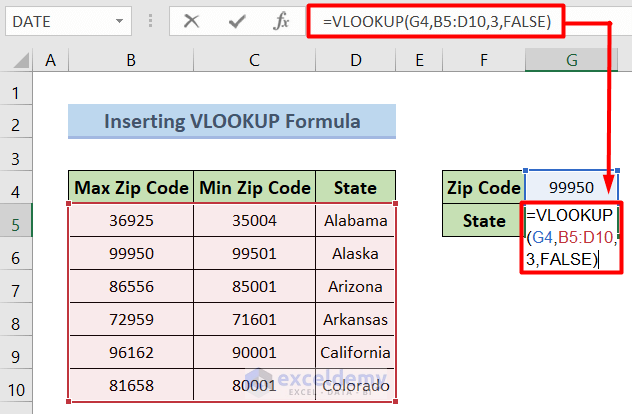
- Press Enter.
- We will find the result just like the picture given below:
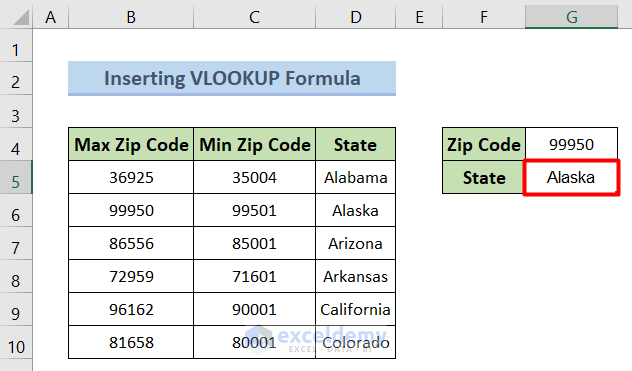
Read More: How to Lookup ZIP Code in Excel
Method 3 – Introducing INDEX Function
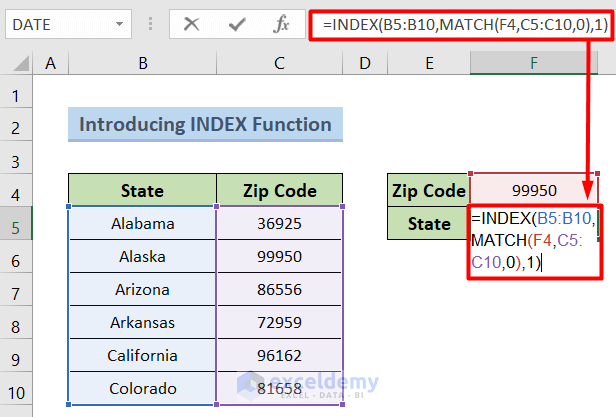
- Enter the zip code in F4.
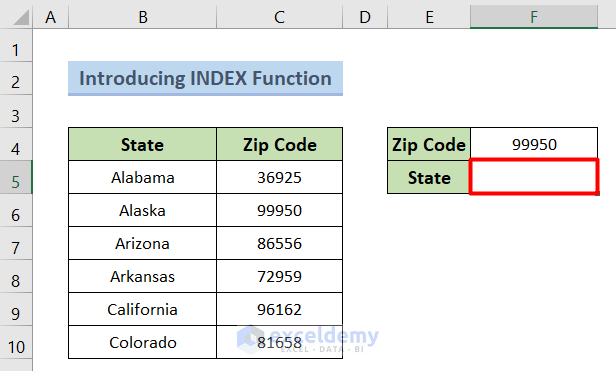
- Select cell F5.
- Enter the following formula:
=INDEX(B5:B10,MATCH(F4,C5:C10,0),1)The MATCH function looks up the value in F4 within the range C5:C10 and returns an exact match. The INDEX function then finds the corresponding state name in the range B5:B10.
- Press Enter.
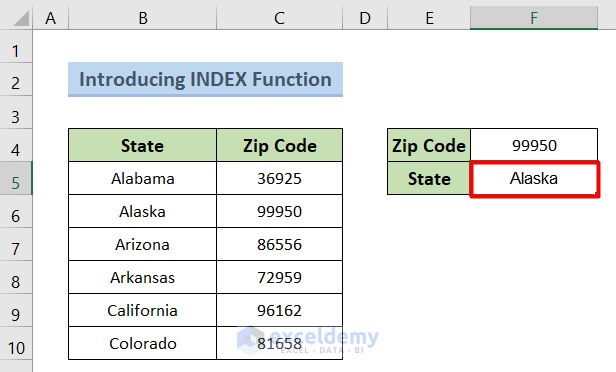
- Herewith the result:
Method 4 – Using the Geography Option in Excel 365 to Convert Zip Codes to States
In this method, we’ll leverage a new feature available in Excel 365—the Geography option—to transform zip codes into state names. Although the process is more involved than the previous methods, it offers an effective solution.
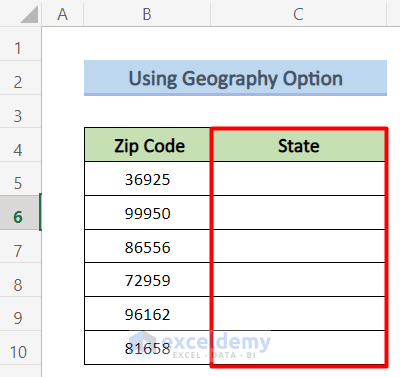
- Select the Entire Dataset:
- Highlight the entire dataset containing zip codes and state information.
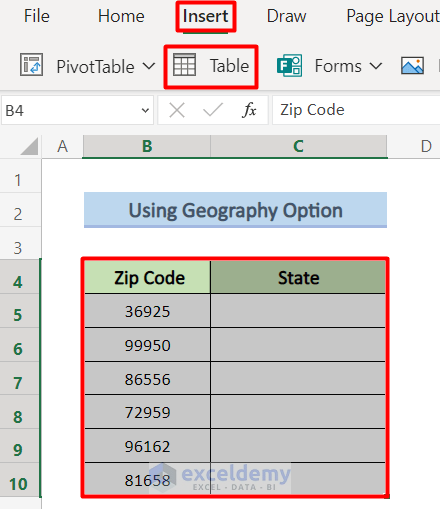
- Create a Table:
- Navigate to the Insert tab on your toolbar.
- Choose Table.
-
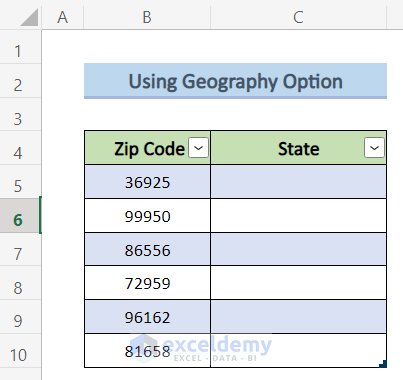
- This will convert your data into a table format, as shown below:
- Focus on the Zip Code Column:
- Select the zip code column within the table.
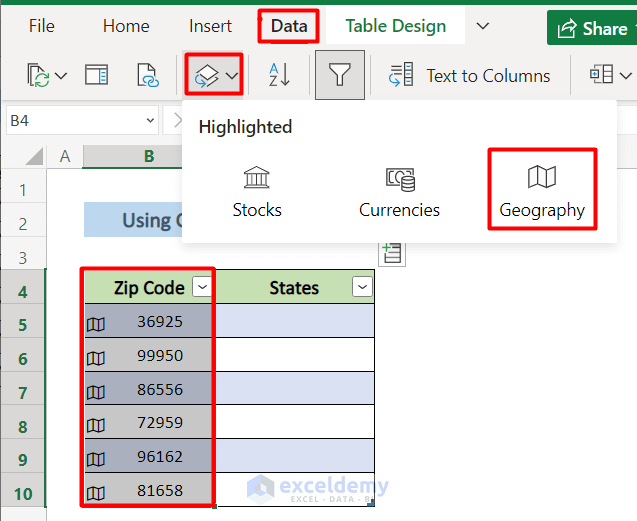
- Access the Geography Option:
- Go to the Data tab on your toolbar.
- Click on the Geography option (highlighted in the image below):
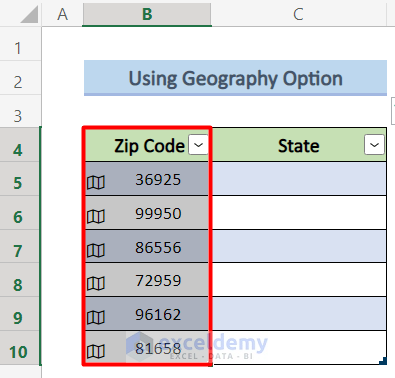
- As a result, you will find the zip code column just like the picture given below.
- Explore Admin Division 1:
- In the corner of the dataset, you’ll find an icon. Click on it.
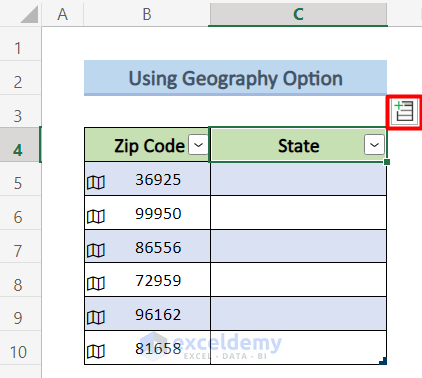
- Choose Admin Division 1.
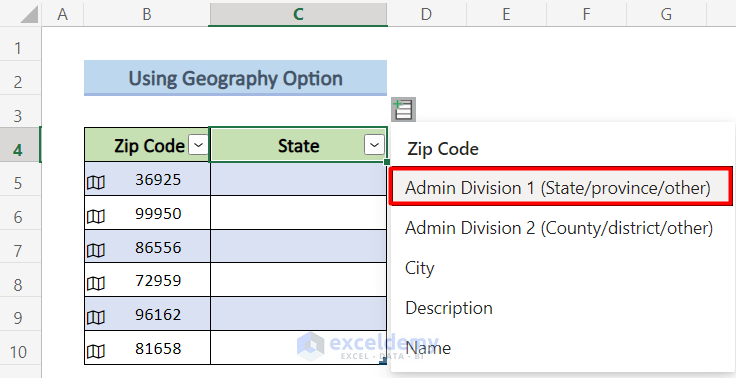
- As a result, you’ll see the state names corresponding to the zip codes, as illustrated below:
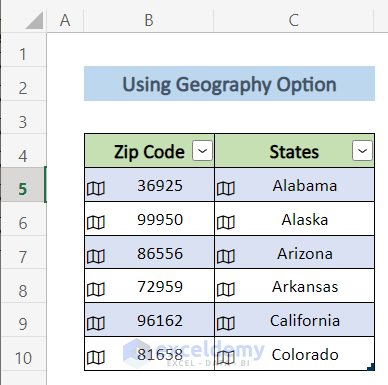
Read More: How to Lookup County from Zip Code in Excel
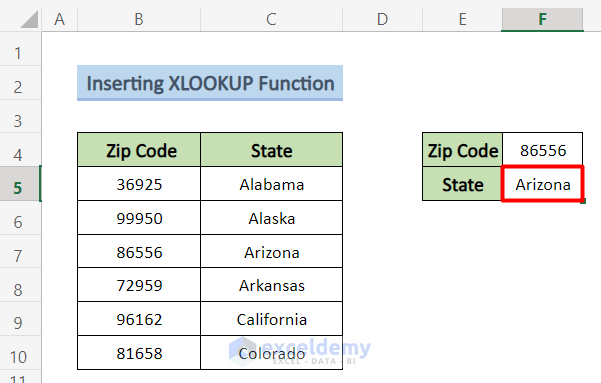
Method 5 – Using the XLOOKUP Function
This final method introduces the XLOOKUP function, another feature available in Excel 365. Follow these steps:
- Select Cell F5:
- Enter the zip code in cell F4.
- Click on cell F5.
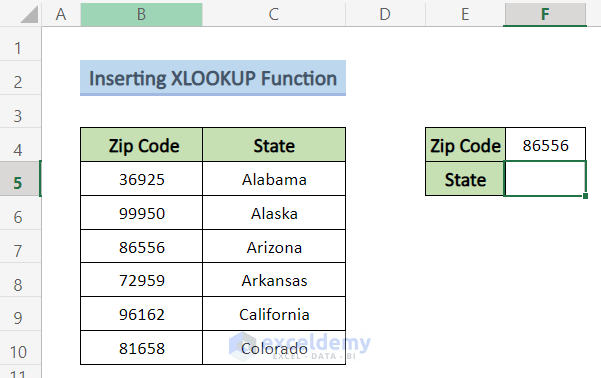
- Apply the XLOOKUP Formula:
- Copy the following formula into cell F5:
=XLOOKUP(F4,B5:B10,C5:C10)The XLOOKUP function searches for the value in F4 within the range B5:B10 and returns the corresponding state name from C5:C10.
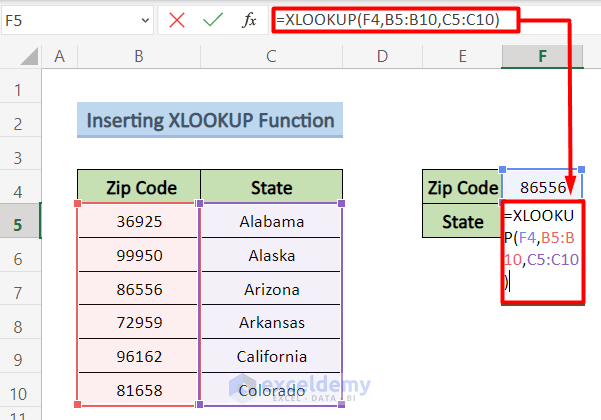
- Press Enter:
- After pressing Enter, you’ll obtain the desired result.
Things to Remember
- Keep in mind that the last two methods are specific to Excel 365.
Download Practice Workbook
You can download the practice workbook from here:
Related Articles
<< Go Back to Zip Code in Excel | Number Format | Learn Excel
Get FREE Advanced Excel Exercises with Solutions!

